Showing posts with label Dairy Free. Show all posts

Wednesday, July 15, 2015

Sun Warrior "Warrior Blend" Creamy-Chocolate-Dreamy Protein Shake Recipe + A Chocolate Protein Base Recipe Too!

Hi - Do you want a smoother, creamier, tastier Sun Warrior Chocolate Protein Shake recipe? Do you want to know how to make any Stevia off-flavors disappear?

Sun Warrior "Warrior Blend" Creamy-Chocolate-Dreamy Protein Shake

We have the recipes and the answers for you here!

Our new Warrior Blend Base is a breakthrough recipe strait from the Kitchen Cheetahs Test Kitchens. 

All in one sweep, this recipe greatly improves the texture of plant protein shakes, as well as canceling out any stevia taste issues (chilling the BASE overnight alone helps mitigate objectionable stevia taste ☺️).

Our Chocolate Protein BASE only takes a minute to make, then you have a ready supply of the "BASE" for making tasty & creamy chocolate protein shakes at the drop of a hat! NICE.

By the way - Any flavor of "Warrior Blend" protein powder works well for making this thick and creamy protein BASE, but if 
you want the chocolate version shown here, then you need to use the chocolate flavored "Warrior Blend" protein powder.

Sun Warrior "Classic" can also be used to make this "BASE". However, rice protein does not soften much, so it won't make as smooth a protein shake as the "Warrior Blend" made from pea protein.

Remember, with this BASE, you can make several smooth & creamy Chocolate Warrior Blend protein shakes. This is very convenient for those busy days.


Sun Warrior "Warrior Blend" Chocolate Protein BASE:

Put in a VitaMix or other high powered blender:

3 c. cold milk of choice (like almond, coconut, cashew...) *


Start blender on med-low and add:

1 c. Sun Warrior Chocolate flavored "Warrior Blend" protein powder

add the protein powder 1/4 cup at a time.

Add:

1/4 t. lecithin

Put the blender lid on tight and switch to the highest speed and blend until the mixture heats up to the desired temperature (from 118 to 155 degrees F). *

For the smoothest texture, use the tamper that comes with the VitaMix blender and heat to 150 to 155 degrees F.

Pour and scrape the finished BASE into a 1-quart mason jar and refrigerate overnight before using in the Creamy Chocolate Protein Shake recipe below.


Tips: 

* Our favorite combination of milks to use for the BASE are 2 cups almond milk plus 1 c. full fat coconut milk.

** 118 degrees F is for "raw"smoothies - heat up to 155 degrees F for the smoothest texture.

The BASE will be cooked at a low temperature and will be steaming at 150-160 degrees F. Some people find this "cooked" pea protein easier to digest. 

Use an instant read thermometer for more accurate results.


NOTES:

1 cup of this prepared BASE contains 1/4 cup of the Warrior Blend protein powder.

Lecithin is a healthy addition and makes it creamier and smoother. Lecithin is especially good for emulsifying the coconut milk.


____________________________________________


Sun Warrior Creamy Chocolate Protein Shake Recipe:

Put in a VitaMix or other high powered blender:

1 c. prepared Chocolate Warrior Blend BASE, well chilled
1 1/2 c. cold almond milk (or other vegan milk of choice)
2 T. coconut milk powder or 1 to 2 T. of your favorite nut butter
2 T. Dutch cocoa powder
2 T. vegetable glycerine
1/4 to 1/2 c. mashed baked sweet potato, yam or banana
1/2 t. real vanilla extract
1/2 t. almond extract
1 pinch cinnamon

Blend everything together on high speed until nice and creamy. 

Garnish with sugar-free chocolate crumbles for added texture and chocolaty flavor and Serve at once.

If you would like a colder, thicker shake, reduce the almond milk called for to only 1 cup and add 4 to 6 ice cubes or cubes of almond milk. Process in the VitaMix to a texture of fine ice crystals.


NOTES: 

The vegetable glycerine is super low on the glycemic scale. Glycerine also enhances athletic performance by preventing dehydration. Cool huh?

The baked mashed yam, sweet potato, or banana both thickens and sweetens the drink and also cancels out the taste of the stevia, which is part of the Sun Warrior protein powder formula.


A fresh batch of our Sun Warrior "Warrior Blend" Creamy-Chocolate-Dreamy Protein Shake.


Enjoy,

Leila & Nancy

The Kitchen Cheetahs!


Yummy Vegan Milk Recipe using our Creamy Plant Protein Base

Try our smooth textured, mild tasting, and easily digested Vegan Milk.

Here is a recipe for a fortified vegan milk that uses our Creamy Plant Protein Base formula.

We like this recipe because it makes a creamy milk that is higher in protein, as well as fiber.

Having a jar of already prepared Creamy Plant Protein Base in your refrigerator makes whipping together a batch of delicious vegan milk much easier. This creamy base replaces the whey protein powder called for in our Rich Lactose-Free Milk recipe posted earlier.

You can always just mix in your favorite plant protein powder blend (as is) if you are in a hurry - but your finished milk won't be so smooth and creamy, and the flavor of the protein will be stronger. You will make a nicer milk when using the prepared creamy protein base.

This is a very versatile recipe. You can sweeten the milk a little, or not, depending on what you intend to use it for. We use healthy sugar-free sweeteners in our milks, as we don't want the extra calories from sugar.

We especially like a combo of almond milk and coconut milk or coconut cream mixed in with our Creamy Plant Protein Base. Try combining your favorite seed milk with coconut milk, we think you will like it. You can easily make a quick coconut milk by pureeing dried unsweetened coconut with a little warm water in a VitaMix, and then squeezing it through a fine cloth.


Mom's Rich Vegan Milk Recipe:

1 quart lactose free milk *
2 to 3 T. Creamy Plant Protein Base, or more to taste
1/8 to 1/4 t. BioSalt, to taste
2 to 4 T. coconut milk powder (for a creamier taste), optional
1/4 t. stevia glycerite, to taste
A few drops of real vanilla extract
A few drops almond extract, optional


Method:

Place the 1 quart lactose-free milk of choice into a blender container.
Add the prepared Creamy Plant Protein Base. Blend to combine well.
Add the flavoring. (Vanilla and/or almond extract is especially good with coconut milk.)
Add the salt to taste, until the mixture does not taste "flat or watery".
Add stevia glycerite, to taste.
Chill.


* You may choose from a variety of unflavored and unsweetened lactose free milks:
Almond milk (in milk section of grocery stores)
Coconut milk (in milk section of grocery stores)
Organic Soy milk (in milk section of grocery stores)
Rice milk (in milk section of grocery stores)
Cashew milk (homemade)
Hemp seed milk (homemade)
Sesame seed milk (homemade)
Sunflower seed milk (homemade)
etc...


See our Copy-Cat Almond Breeze Recipe for an example of how to make your own nut milk.


Notes: 

You can make this milk rich and sweet enough to be similar to Half & Half.

You may add 1/4 t. non-GMO liquid lecithin to this vegan milk, particularly when using coconut milk - It helps emulsify the fat, and adds wonderful nutrition for the nerves. Lecithin also makes the milk taste even creamier and richer.

Almond extract is the best thing we have found for complimenting the flavor of coconut, in fact going so far as to partially neutralize the coconut taste for people who do not like the taste of coconut milk.

This milk is wonderful used in many ways:

Added to hot cocoa mix
Poured over hot cereal like oatmeal
Used as a base for smoothies
Used as an ice cream base
Chilled for drinking a tall cold glass along with a side of cookies


Enjoy,

Leila & Nancy.

Creamy Base for Smoothies, Protein Drinks & Milks (several vegetarian & vegan options)

Make this rich and creamy protein smoothie base ahead of time for quick healthy morning smoothies or dairy-free milk. 
Creamy Plant Protein Base

We have several ingredient options listed here, to fit just about any dietary need out there. We like keeping a mason jar full of this creamy protein base in our refrigerator. 

Add a bit of this base to your favorite smoothie recipe to up the protein and fiber content. We also use this Creamy Base recipe in our Yummy Vegan Milk Recipe post.

We highly recommend that the plant proteins be prepared ahead of time as a "Base". This results in a smoothie or milk with a smoother texture, milder flavor, and easier digestibility. Some people have an easier time digesting this gently heated plant protein base verses the raw form of the plant protein.

You can always mix in your favorite plant protein powder blend (as is) if you are in a hurry - but your finished smoothie or beverage won't be so smooth and creamy, and the flavor of the protein will be stronger.

Use this PLANT PROTEIN BASE formula to make our protein and fiber enriched VEGAN MILK.


Mom's "Creamy Plant Protein Base" Formula:

Put 3 cups of very hot distilled or purified water in a high powered blender (VitaMix) with a snug fitting lid.

Add 6 to 8 T. of your favorite vanilla flavored plant protein powder blend *

Put the lid on securely and then cover the top with a folded dish towel (in case some hot liquid should escape - be on your toes). Keep your hand on the towel-covered lid while processing.

Start the blender on the lowest speed and slowly increase to the highest speed, blending for at least 30 seconds - until the contents are steaming hot (120 to 160 degrees).

Set aside and allow to cool.

This is your "Creamy Plant Protein Base". It will thicken as it cools. Add desired amount of this protein base to your vegan "milk" - to taste.

My mom likes to keep a quart of this "Plant Protein Base" in her refrigerator, so that it's ready to add to "milk" or smoothies.

All of my mom's "Mylk" versions are rich and creamy, so it's easy to add a little cold water if a less rich mylk is desired.


* Vegan Protein Fortification Options:

1. Pea protein powder base (Sun Warrior "Warrior Blend").

This "Plant Protein Base" works best when using pea protein. Pea protein seems to make a smoother, creamier "base".

2. Pea plus rice protein powder (Sun Warrior "Classic")

3. Vanilla non-GMO organic soy protein blend of choice

4. Non-GMO organic Plain Soy Milk Powder.

5. "Silken Tofu" puree.

6. Rice protein powder: Using rice protein as your base is definitely not our first choice! The results with our first experiments with it were this: It did not soften with the hot water and blending on high speed, no matter how long we blended it. The rice protein stayed gritty, chalky, and gacky, unlike the pea protein that softened up nicely. We tried again with another brand of rice protein from Top Health. It was fresher and is a protein of high quality and fine texture. The taste was quite nutty and mild, and after shearing a couple of rounds on high speed in the VitaMix , the texture was acceptably smooth - and should be OK once mixed with other truly creamy milks.

6. Your other favorite vanilla flavored vegan protein "base".


Our "Plant Protein Base" conclusions: Be sure your plant based proteins are of good quality and fresh!


OVO - Vegetarian protein fortified "mylk" options:

1. Egg white powder

2. Pasteurized pure liquid egg whites

Egg white if used in moderation, is invisible in your beverages.

Do not heat any "Mylk" containing egg!


Lacto-Vegetarian Options:

1. Whey protein isolate (contains lower lactose than whey protein concentrate or regular milk).

2. Whey protein concentrate.

3. Powdered milk (cow or goat, if liked).

4. Reduced fat ricotta cheese - pureed smooth.


Enjoy,

Leila & Nancy.


Sunday, July 12, 2015

Flax Pumpkin Pie Nuggets for Health Nuts - High-Fiber, Sugar-Free, Grain-Free (with Vegan option)

This is a strange little cookie. That being said, my daughter and I eat them all the time. 

Flax Pumpkin Pie nuggets for Health Nuts

My recipe uses flax meal instead of flour, which gives these more of a pumpkin pie-like texture inside. You do taste the flax, although it is tempered by the use of the spices and almond extract. These cookies are not overly sweet either, but the chocolate chips totally save the day.

These little nuggets are best eaten warm. Then the chocolate is all oozy and delicious. This is why we warm them up for a few seconds before eating them. There is no sugar to preserve these cookies, so they must be stored in the fridge.

Why do we eat these nuggets? They are super healthy (and we are health nuts in this house). These are basically all fiber. I will eat a few of these for breakfast or a snack and they fill me up if I drink a healthy dose of water with them. These are fabulous for helping your blood sugar levels stay even, again, thank all the fiber for that. I add the protein because, well, I wanted protein in them too!

These cookies have helped me when I have set my mind to slim down a bit. They are ready for any snack attacks if I have them at the ready in my fridge. It doesn't take much time at all to bake up a new batch when we are out either.

If you hate eating flax, you may see these cookies as an improvement for flax, or you may not.

I say, live on the edge and make yourself a half-batch, and see how it goes. Warning: They grow on you (not like a fungus though).


Flax Pumpkin Pie Nuggets

1 29-0z can plain pumpkin puree
1 large egg (can omit for vegan)
1 t. real vanilla extract
1/2 t. almond extract
3/4 t. stevia glycerite
1/2 c. erythritol
1 t. sea salt or BioSalt
3 t. pumpkin pie spice
1/2 t. ground cinnamon
1/2 t. ground cloves
1 t. psyllium husk powder
1 c. plain whey protein isolate (or vegan protein powder)
2 1/2 c. freshly ground flax meal
1 1/2 c. semi-sweet chocolate chips (sugar-free or regular)


Method:

Preheat your oven to 350 F. Line 2 cookie sheets with silicone liners and set aside.

In a medium sized mixing bowl, combine by hand, the canned pumpkin with the other wet ingredients.

Add the eythritol, salt, spices, and psyllium husk powder and mix together very well.

Add the flax meal and combine until uniform.

Stir in the chocolate chips.

Portion dough using about a 1 tablespoon sized ice cream scoop. Place close together onto the cookie sheets (the dough does not spread).

Bake for 12 minutes. the outsides will be set but the insides will remain very soft.

Remove from oven and let cool completely on the cookie sheets.

When cooled, transfer to air-tight containers and store in the refrigerator.

To serve: Place a few nuggets into a plate and microwave them 20 to 30 seconds.


I'm adding some pictures of our dog Moki because he is cuter than these cookies.


Enjoy,

Leila.

Tuesday, July 7, 2015

Dad's Healthified Orange Julius - with a Secret Ingredient (Copy-Cat)

So over the top good and refreshing & good for you too!


My dad comes up with killer protein drinks. Being an athlete and trainer for athletes, he drinks protein drinks a lot. You have to mix it up a little if you drink a lot of them, or YAWN....

He makes protein drinks we WANT to drink. This is one of them, and it has a unique secret ingredient... Angostura Bitters.

As a family, we have been exploring bitters and tonics. Some people use them for alcoholic drinks, but actually bitters are old fashioned remedies for digestion and general health. We like to use them to create depth of flavor in various recipes and non-alcoholic beverages, much like you would use vanilla or almond extract. As far as bitters go, Angostura Bitters is king. It is affordable and has great flavor. It is the secret ingredient in this version of an Orange Julius. Give it a try.


Dad's Orange Julius Recipe:

Makes 2 big servings:

10 ice cubes
1/4 to 1/3 c. frozen orange juice concentrate
1/2 c. almond milk
1 scoop (3 T.) whey protein isolate
1 pinch sea salt or BioSalt
1 pinch orange flavor powder or 1 to 2 drops tangerine essential oil
stevia glycerite, to taste
Angostura Bitters, to taste


1 big serving:

5 ice cubes
2 to 3 T. frozen orange juice concentrate
1/4 c. almond milk
1 1/2 T. whey protein isolate
mini-pinch sea salt or BioSalt
mini-pinch orange flavor powder or 1 drop tangerine essential oil
stevia glycerite, to taste
Angostura Bitters, to taste


Method:

Place all but stevia glycerite and bitters in a blender and blend until smooth.

Add stevia glycerite and bitters to taste, blending in well.

Serve cold.


Enjoy,

Dad.

Sunday, July 5, 2015

About Vegetable Glycerine in Sugar-Free Cooking


Here is some useful information about food grade vegetable glycerine.

We use food grade vegetable glycerine a lot here at Kitchen Cheetahs. It works wonderfully as part of sugar-free sweetening systems. We use it as the base of our home made Stevia Glycerite (a NOW brand copy-cat recipe). We use it in sugar-free syrups. in icings, salad dressings, in baked goods, among other things. We have used this basic ingredient for years and love it!

See it used here in our Super Low Carb Fiji Sweet Hot Sauce.

We highly recommend having it in your pantry, because it is in several Kitchen Cheetah recipes.

Review some of it's good features below...


FOOD GRADE VEGETABLE GLYCERINE:

* is made from coconut or palm oil (heating under pressure with water)
* is GRAS
* is approved by Health Canada
* does not affect blood sugar – perfect for diabetics
* does not cause tooth decay
* helps prevent dehydration
* enhances athletic performance
* helps prevent constipation
* used as a humectant for skin conditions, specially dry skin.
* medically used to prevent brain swelling (intravenous)
* medicaliy used to reduce pressure within the eye (intravenous)
* is an excellent food preservative
* is an excellent emulsifier
* is used in eye-drops for dry eyes (pharmaceutical grade)


VEGETABLE GLYCERINE  is classified as a "sugar alcohol"....  as is ERYTHRITOL and XYLITOL.


Stay tuned,

Leila & Nancy

The Kitchen Cheetahs

Saturday, July 4, 2015

Super Low Carb Fiji Sweet Hot Sauce

This amazing secret sauce is intensely punchy & sweet & spicy & fragrant...

And here is an even lower carb version for the athlete!

Fiji Sweet Hot Sauce

Happy 4th of July! This zippy recipe is our gift to you. We thought you should have some fireworks for your mouth to go along with the exploding night sky.

My mom created this healthy sauce while living in the Fijian islands, thus the name. Many people have asked for this recipe but alas, it could not be acquired - UNTIL TODAY. Do you feel loved?

"Fiji Sauce" brings it all together.
Our original Fiji Sweet Hot Sauce is much lower in carbs and sugars than a traditional Thai sweet chili sauce and you can use our yummy sauce in much the same manner.

This lower carb version omits the ripe banana and orange juice called for in the original recipe. No xylitol is used either, because it has more carbs than erythritol.

My dad has a black belt in Judo and is an instructor as well.The many athletes he trains and coaches want this very version of our Fiji Sauce because of it's super low carb and high fiber content. It helps these athletes keep their body fat percentage down, yet allows them to have a sweet treat, usually forbidden in their strict diets. This sauce does make you feel like you are cheating, it is so delicious!

Erythritol is used as the main sweetener in this lower carb version of Fiji Sweet Hot Sauce. Stevia glycerite is used to enhance the sweetness further.

Our punchy Fiji Sweet Hot Sauce is delicious as a condiment with just about anything. It makes a great dip, topping, sauce, dressing... uhh, main dish?

My dad has some of this punchy sauce everyday with his lunch or dinner. It is a beloved staple here at Kitchen Cheetahs! The picture above shows my dad ready to dig into a plate of our favorite Chicken Bake, with a side of our Quinoa Tabouli topped with this Fiji Sweet Hot Sauce.


Fiji Sweet Hot Sauce Recipe:

10 ounces frozen raspberries
12 ounces frozen pitted cherries

Mix the fruits together and set aside to thaw to room temperature.

While the fruit is thawing make a Habanero Paste:
4 to 6 habaneros
1/2 c. granular erythritol

Wearing gloves, remove the seeds and and pith from the habanero peppers.
Finely mince habaneros and then smash with the 1/4 c. erythritol to make a very smooth paste.

Puree the above thawed fruit with:
The prepared Habanero Paste above
2 16-ounce jars of "fire roasted" red peppers and their juice
4 c. granular erythritol
1/2 c. whole psyllium husks
3/4 c. raw apple cider vinegar, or a little more (to desired tanginess)
4 T. FINELY grated frozen, peeled ginger root, to taste
1 to 3 t. fresh orange or tangerine zest, to taste (or 1 to 2 drops orange or tangerine essential oil)
3/4 t. sea salt or BioSalt, or a little more, to taste
1/2 t. turmeric powder
1/8 to 1/4 t. garlic powder, to taste

Pulse/grind into a medium smooth sauce. Do in batches to accommodate your food processor.
Put the processed mixture into a large non metallic bowl or pot.

Stir in:
1 1/2 c. water
1 c. vegetable glycerine (food grade)
Stevia glycerite to taste

Add stevia glycerite to taste. It will take quite a lot (don't be surprised) to make a very sweet sauce balanced by zip and tang.  

Gently heat and stir the sauce until it reaches 110 degrees F, to blend flavors and activate fiber.

Let sauce cool before transferring into mason jars. Put 1 jar in your fridge and freeze the rest.


Notes: 

Start with 1 t. of orange zest, stir in well and then taste the sauce. You can try adding a little more orange zest, but you dont want the sauce to taste like oranges... just be highlighted in a subtle way.
.
This sauce mellows and changes a little overnight. The heat mellows and the apple cider vinegar mellows, so make sure you use enough peppers and vinegar to give a strong punch to this sauce!

My mom prefers the flavor of our first version of Fiji sauce that used more fruit plus xylitol. She is on a super low carb diet right now and does not mind the few extra carbs in the fruitier sauce.


 Photos of the process:


Be very sure that the Habanero pieces are very fine so you don't bite down a piece of ultra-hot pepper....  This also ensures that the unique Habanero flavor is dispersed beautifully throughout the sauce.

HABANERO PEPPERS ARE CRUCIAL TO THE SUCCESS OF THIS SAUCE ‼️(however, you may reduce  from 3  peppers down to 2 if you absolutely must)


Frozen ginger grates best! Use a very fine grater or a micro plane grater  so that the ginger is essentially powdered for Best results.


Psyllium husk's thicken the Fiji Sweet-Hot Sauce. It's a good idea to purchase organic psyllium if you can, as it is guaranteed to be clean.


Summer chicken snack: Coarsely shred chilled white chicken breast and serve with your favorite mayonnaise and a side of Fiji sweet hot sauce.It's super fast. Super quick. Super delicious!

Mayo and Fiji sauce dipped chicken


Chicken breast dipped in mayo and Fiji sauce - It doesn't get better than this.

3 1/2 quarts of Fiji sauce❤❤❤

Gorgeous birds eye view of the 3 1/2 quarts of Fiji sauce

Well, Hello Gorgeous!

Enjoy!

Leila & Nancy.

Friday, July 3, 2015

Summer Confetti Macaroni Salad (sugar-free)

This is a colorful classic macaroni salad with a great balanced flavor.
Summer Confetti Macaroni Salad

This pretty pasta salad makes a nice side for summer picnics and celebrations. I love having more crisp, colorful vegetables in my pasta salads. I really don't want to eat just plain macaroni slathered in mayo... If you are like me, you will love this recipe. I also like that it has enough vinegar to give it a bit of zing and enough erythritol to cut the bite of the vinegar, then our BioSalt pulls it all together.

You may use gluten-free pasta, if desired. If you are going dairy-free, omit the sour cream and replace it with mayonnaise. And of course you can adjust the diced vegetables to taste.


Leila's Summer Confetti Macaroni Salad Recipe:

1 pound pasta or gluten-free pasta (macaroni, ditalini, or small shell pasta)
3/4 c. real mayonnaise
1/4 c. sour cream (omit if dairy-free is desired and increase the mayo to 1 cup)
3 T. white wine vinegar
3 T. erythritol
1 1/2 t. dry mustard powder
1 t. sea salt or BioSalt, to taste
1/2 t. onion salt, or more to taste
1/8 t. garlic powder
1/2 t. fresh ground pepper, to taste (about 50 grinds)
2 to 4 T. fresh minced parsley, to taste
1 c. finely diced celery (4 ribs)
1 c. finely diced red bell pepper (1 whole pepper)
1/2 c. finely diced peeled carrot (1 large carrot)
1/4 c. finely diced red onion
1/2 c. minced scallions, about 6, optional
1/4 c. diced radishes, optional

Garnish:
Paprika
Cherry or grape tomatoes, halved, optional

Method:

Cook the pasta aldente, rinse and drain extremely well. Set aside to cool.
Mix the mayonnaise, sour cream, vinegar, and erythritol together, until erythritol is dissolved.
Add the mustard powder, salt, onion salt, garlic, and pepper, mixing in well.
Add the minced vegetables and then the pasta and gently mix together. Taste.
Chill overnight for the best flavor.
Taste and adjust seasoning if desired.
Garnish with a sprinkling of paprika. Top with tomatoes, if desired. Serve cold.


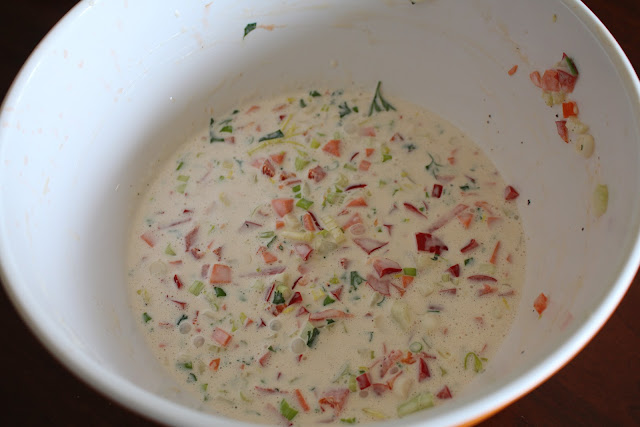
The dressing and vegetables mixed together.

Freshly mixed pasta salad.

Delicious!


Enjoy,

Leila.

Sunday, June 28, 2015

Yummy Sun Warrior Butterscotch Protein Pudding (Low-Carb, Vegan & Sugar-Free)

Butterscotch Pudding with Crispy Toasted Almonds and Monkey-Break Bananas.

Here It is as promised... Now you can have dessert for breakfast. 

Here is our delicious low-carb, sugar-free Butterscotch Protein Pudding recipe! First we came out with a yummy chocolate protein pudding. Next I will be posting a recipe for Vanilla Protein Pudding!

We love these puddings because they are really good for you and they are very enjoyable to eat. I feel good about offering this to my family, and you can too. Like the chocolate protein pudding, this is low-carb, sugar-free, gluten-free, corn-free, egg-free, dairy-free, and vegan.

You also get a nice dose of healthy coconut oil in this recipe. Research the virtues of coconut oil if you are unfamiliar with it's health benefits.

This pudding is silky, creamy and dreamy. You will be very surprised when you review the ingredient list. It is unusual but trust me, it's good. It is very quick to mix up a batch in your VitaMix (high-powered blender). This pudding is"cooked" just like the Sun Warrior Chocolate Protein Pudding. You can then transfer it to serving size mason jars and store in your refrigerator, and it will be ready when the cravings hit. It freezes beautifully too.


Sun Warrior Butterscotch Protein Pudding Recipe:

3 c. hot water
1 1/4 c. Sun Warrior "Warrior Blend" Raw Vegan Vanilla Protein powder
1/2 to 1 c. Golden Lakanto Zero-Calorie Sweetener, to taste
3 T. deodorized coconut oil
1 T. caramelized ghee  (or omit and just use 1/4 c. coconut oil)
1/4 c. raw cashew butter (could try roasted cashew butter)
1/4 c. Kitchen Cheetah's sugar-free maple syrup
1 c. deep orange baked yam (without skin)
1/4 t. Kitchen Cheetah's BioSalt
Kitchen Cheetah's Stevia Glycerite
Butterscotch flavor, to taste (or vanilla and butter flavor, plus rum or brandy flavor)


Method:

Place the HOT water into a VitaMix blender container.Then add the 1 1/4 cup protein powder, and 1 cup Golden Lakanto.

Put the VitaMix lid on and blend on medium speed just until combined. Turn off the blender and then scrape down the sides of the blender.

Secure the lid on tightly and process on highest speed until steaming hot and perfectly smooth. The temperature should reach at least 130 degrees F. for the pudding to have the best texture and flavor (don't go over 170 degrees). The friction of the blades heats the liquid after a short time. Measure temperature with a thermometer.

Turn off the VitaMix, remove lid and add the rest of the ingredients to the blender, except for the stevia glycerite and flavoring.

Place lid tightly on and process on the highest speed until the pudding is steaming hot and smooth. Scrape down the sides as needed (with the blender turned off!). If the mixture gets a little too thick, use the "Tamper" to help it along. 

Turn off the VitaMix, Taste the pudding. Add stevia glycerite, a few drops at a time, to taste if you want the pudding sweeter. Add flavorings to taste.

Give a final blend and taste for balanced flavors.

Portion finished pudding into serving-sized jars and store in the refrigerator. The jars of pudding also freeze well!


To Serve:

A good way to serve this is to top the pudding with sliced or broken bananas and crushed gluten-free pretzels. Pour your favorite cold, milk over top and dig in! Our favorite milks are whole organic milk, almond mylk, coconut/almond mylk, or cashew mylk.


Notes: 

This pudding thickens more when chilled due to the coconut oil content. If the chilled pudding turns out thicker than you would like, just stir in a bit more water to suit your individual taste.

We add the flavorings to the pudding to make the most of the butterscotch flavor and to make the least of the pea protein flavor!


Enjoy,

Leila & Nancy,

Authentic New York Deli-Style Potato Salad - Made Healthier and Brined for best flavor 24 hours

New York Deli Potato Salad.

Try this delicious flavor-packed potato salad for your next get together. People love it.

This type of potato salad is found in Queens, New York, Long Island, and in some Jewish or Italian delis. You don't really see it elsewhere.

Have you ever made a brined potato salad? Iv'e been doing it now for over 20 years and I keep coming back for more. The flavors deeply penetrate the potatoes when prepared this way and the result is a creamy dynamic potato salad with out having to use tons of mayo. Don't get me wrong, we love mayo around here.

It takes a couple of days to make this salad but it is well worth the effort. It continues to taste better each day too. Make sure you do not over cook the potatoes. Chilled potatoes that sill have a bite to them are perfect.

Did you know that cold potatoes contain resistant starch in them?

Do you know why that is a great thing?

Simply put, resistant starch resists being digested, resists breaking down into sugars in the body, and resists adding pounds to your body. Resistant starch is good starch.

Hot potatoes do not have this benefit. Pasta, by the way, is shown to have more resistant starch in it than hot pasta. I feel better about eating cold potatoes over cold pasta, however. Pasta is still generally white flour and/or starch and doesn't have the best nutritional value.

This recipe easily doubles.


New York Deli-Style Potato Salad Recipe:

3 to 3 1/2 pounds organic young new potatoes
1/2 cup finely minced onion, to taste
1/2 cup purified water
1/2 cup  white wine vinegar (healthier than plain white vinegar)
1/2 cup sugar (or xylitol, for a sugar-free version)
2 T. light olive oil (better than the usual canola oil)
1 T. sea salt or BioSalt
1 t. white pepper powder
1 t. dry mustard powder, optional
2 T. finely minced fresh parsley, or more to taste
1/2 to 1 cup Thick, high quality mayonnaise, to taste (Real Foods or Hellman's)
2 T minced red pimentos, optional
1 c. finely minced celery, optional


Method:

Day One:

Place cleaned potatoes into a large pot and cover with water and bring to a boil. Once boiling, reduce to a gentle simmer and cook just until a fork pierces a potato with little resistance. They should not be cooked until completely soft or you will have mushy potato salad.

Remove potatoes from stove, drain and cool in an ice bath. chill in the refrigerator until completely cold. It's easy to do this 2 days before you want to serve the salad.

Day Two:

Once potatoes are cold, halve and then slice into desired size. You can leave the skins on (I do) or rub them off.

Place the potatoes into a bowl and add the finely minced onion.

Make the hot brine by putting the water, sugar, vinegar, salt, white pepper, and mustard powder into a sauce pan and bringing to a boil, stirring just until dissolved. Remove from heat. Add the oil and taste your brine. It should have balanced flavors of sweet, savory, sour, with a pleasant heat from the white pepper and mustard powder.

Pour the hot brine over the potatoes and onions in the bowl. Toss gently to coat. Seal air-tight and chill 24 hours. I like to stir a couple times during this period.

Day Three:

The brine will be absorbed by the potatoes. If there is excess brine, drain it off. Add the minced parsley and mayonnaise to taste.

You may optionally add 2 T. minced pimentos for color and 1 cup finely minced celery for added texture.


Enjoy,

Leila.

Kamote Tops (sweet potato vines) and tasty, healthy ways of preparing them (Rejuvenating & Detoxifying).

Sketch of Kamote Tops, by Nancy Glazier.

"Bonne Sante'" is French for "good health!"

"Bonne Appetit" (good appetite!) is well known thanks to Julia Child.

It has been my experience that good fresh green Juices can contribute to both!

Where have all the bitters gone? Long time passing.... 
We have become so ensnared with sweets that most of us have forgotten about the subtle allure of the bitter edge..... 

Did you know your  body (especially your liver) actually craves bitter foods?


Sweet Potato Vines. also known as Kamote.
Why not get back in balance by cultivating an appreciation for bitter greens – they're waiting in the wings, ready to be your best friend.


Sweet potato greens are also known as KAMOTE TOPS, and are famous for building up iron levels in the blood in a natural & gentle way.

Adding a handful of sweet potato leaves to your favorite green mix- when you make your green drinks - - gives you a deep emerald green juice.... yet the taste is mild compared to a lot of other greens.

See one of our favorite green drink mixes HERE.

We were so excited to learn of Kamote, which has been a more recent discovery for our family. We love using this green in our meals. Kamote or sweet potatoes are very easy to grow in your garden. They are heat tolerant even in the hottest summers. The beautiful vines grow very quickly, so you will have a generous harvest of this delicious, versatile, and affordable green. Kamote is commonly eaten in other parts of the world, yet is virtually unheard of in the USA. It seems like our produce selection in general has become more limited than in earlier times. So, here's a shout-out to heirloom vegetables and fruits!

You can use Kamote tops as you would spinach, kale, collard greens, or Swiss chard...
They taste terrific steamed, blanched, simmered in soups & stews, used like spinach in spinach dip, in salads, lasagna... Kamote is mild flavored and delicious. If you plant sweet potatoes in your garden, you can harvest the tender tops until first frost. We like to blanch them and freeze them in meal sized portions for use all winter. One of our favorite meals is homemade Pork Chili Verde ladled over tender pinto beans and steamed kamote tops. We then top it with jack cheese and let it melt before serving.

We are sure that you will enjoy cooking with Kamote Tops too!


Perfect KAMOTE topsReady at a moments notice for my green drink.
"Heart of Green" drink, with added Kamote Tops.
Perfect! This is a great way to consume your bitters.


Bonne Appetit,

Nancy & Leila.

Wednesday, June 24, 2015

Monkey Break Bananas - A fun new way to open up a banana, and sugar-free recipe ideas using them.


Monkey-Break your bananas!
This is a fun post about a way to open and break up a banana without bruising it.

This playful method also keeps the banana from browning and oxidizing so quickly, which is really nice if you want to put the bananas into fruit salad or pies. Most importantly, it's fun to do it this way! Try it, you'll like it.

When my parents lived in beautiful Gardner Montana, a missionary from Samoa came to visit them. This is how this young Samoan ate a banana and my family has been doing it this way ever since.

Now I wonder where the Samoan learned it from...

My mom told me that many island people do eat bananas in this simple, natural way.

We named it Monkey-Break bananas because it seems like a good way for a monkey to do it, seeing that they don't usually carry around pocket knives. Please don't ask about our logic concerning this... Maybe a monkey has actually done this before...

Anyway, Monkey-Break bananas stay fresh much longer than sliced bananas because the cell walls are not smashed during cutting. My parents lived in Fiji for several seasons and they witnessed the Fijians eating bananas in this manner also.


It's not like you don't already know what to do with bananas, but here are some more ideas for you:

You can dip these monkey-break banana strips (or small squares) into gently melted Lakanto Sugar-Free Chocolate and then chill. These can keep 2 to 3 days in the refrigerator... If they last that long!

Try a chocolate banana cream pie (!) with our Sun Warrior Chocolate Protein Pudding. Use only 3 cups total liquid (instead of the 3 1/4 cups) in the pudding recipe so that the pie will be firm enough to slice.) Now we're talkin'...

Serve the broken up bananas over top a bowl of Sun Warrior Chocolate Protein Pudding and pour over some milk (dairy or nondairy). Our favorite nondairy milk is BLUE DIAMOND "Almond Breeze" Almond/Coconut Milk blend (unsweetened!). Look for it in the dairy cooler.

Serve the Monkey-Break bananas with your favorite whipped topping - dairy or nondairy. You can top with crushed gluten-free pretzels if you want... Oh yeah.


The pictures below are of my dad showing how this is done. I thought it would be nice to have his man hands on our blog. I love you dad - you always are teaching us cool stuff!


Our favorite commercial non-dairy milk.
Cool, right?
You can then break up or slice into bite size pieces, as desired. Here they are shown with our delicious, sugar-free Sun Warrior Chocolate Protein pudding.


Enjoy,

Leila & Nancy.