Saturday, May 16, 2015

French Chocolate Anise Bark Recipe (Copy-Cat Recipe) Gluten-Free

This unique recipe is a copy of a chocolate bark made in a Paris restaurant called L'ARPÈGE. 


Make this lovely chocolate, then close your eyes, take a bite and imagine you are in Paris as you savor this delicious treat. If you want to imagine that you are in Paris anyway... I do know that this chocolate will take you somewhere... To chocolate bliss land.

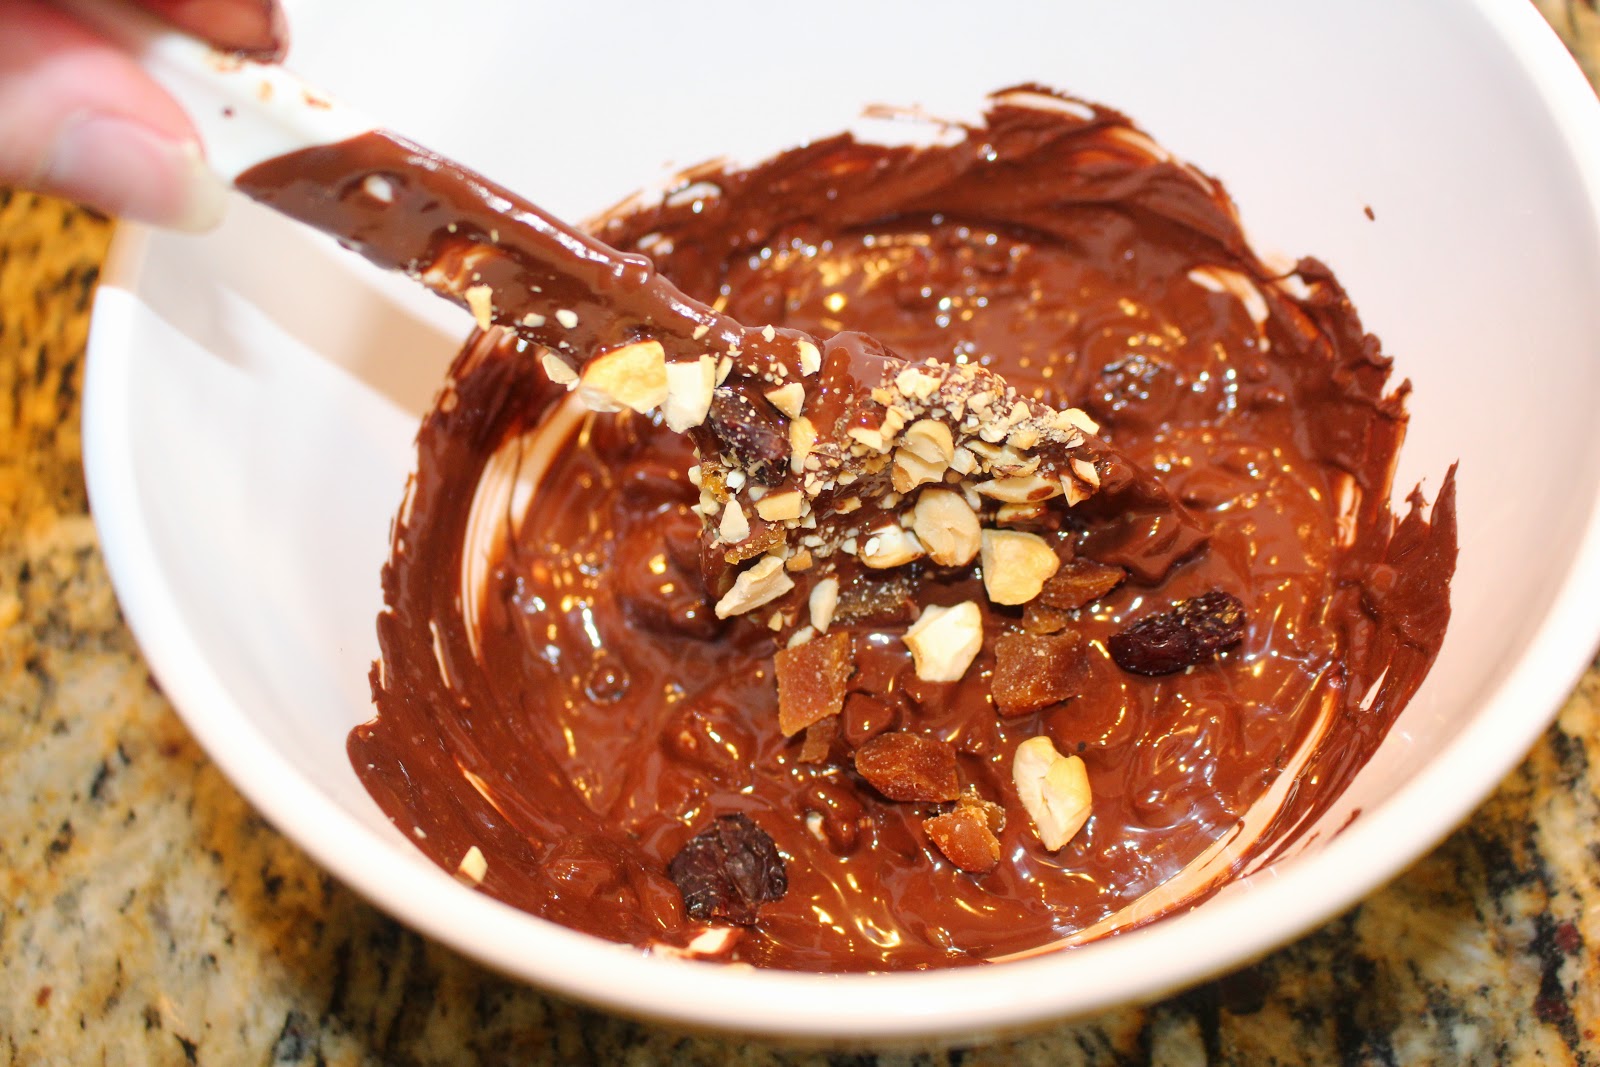
This delicious chocolate is exotic with many flavor and texture dimensions. We love it. It is also extremely easy to make. You can make a half batch the first time if you are not sure what you think of anise flavoring, which is licorice-like. Trust me though, this is g-o-o-d.

To make this chocolate even better, I recommend my mother's healthy sugar-free dark chocolate formula manufactured by Lakanto. It will be sold at Whole Foods. Call your local Whole Foods store and ask them to order it in , if they don't have it in stock yet. You will love her chocolate!


Chocolate Anise Bark Recipe:

Serves: 12

12 oz high quality bittersweet or dark chocolate, finely chopped (Lakanto Dark Chocolate is our fav.)
2 t. (4 grams) anise seeds, freshly ground to a fine texture in a krups seed mill
2/3 c. (12 grams) dried (pitted) sour cherries
2/3 c. (16 grams) dried apricots, coarsely chopped
2/3 c. (12 grams) roasted salted cashews,coarsely chopped
1 drop star anise essential oil, optional


Method:

Line a cookie sheet with a silicone mat or parchment paper. Chill the cookie sheet a few minutes.

Melt the chopped chocolate in a microwave safe bowl in 45 second intervals until melted and smooth, stirring in between.

While the chocolate is melting, prepare the fruit and nuts and mix together in a bowl.

Stir the finely powdered anise seed into the melted chocolate.

Optionally add 1 drop of star anise essential oil and stir into the chocolate very well, if you want a stronger anise flavor.

Stir half of the fruit and nut mix into the melted chocolate.

Spread the chocolate mixture onto the lined and chilled cookie sheet with a spatula into a rectangle shape.

Quickly sprinkle the chocolate with the rest of the fruit and nut mixture and gently press in so that it's slightly embedded in the chocolate.

Chill the chocolate until it is completely set up, up to 30 minutes.

Break into 12 pieces and store air-tight.


Note: Lakanto's Dark chocolate is sugar-free and delicious and it is formulated by my mom!


Photos of the process:


Enjoy!

Leila.

Friday, May 15, 2015

Crazy Good Low-Carb Fluffy Buttermilk Pancakes (with variations) - Gluten-Free, Sugar-Free, Guilt-Free!

First we nailed making delicious low-carb pancakes. Exciting. But, what we really love are Buttermilk Pancakes!


It took a little more experimenting until we nailed a fabulous buttermilk pancake recipe too.

Our buttermilk pancake recipe is similar to our regular low-carb pancake recipe. The gluten-free "flour" blend is the same, for example. The leavening system is different to allow for the acidity of the buttermilk. We were aiming for the ultimate fluffy pancake...and we got it! We are very excited to share this recipe with you. we are still in pancake recipe creation mode. We are experimenting with using different liquids in the pancake mix, like almond milk, soy milk, yak milk (just kidding).

We have even created cinnamon roll pancakes! Seriously, topped with our sugar-free Cream Cheese Frosting... You could be arrested for eating one of these in public, if you don't have enough to share! These are so over-the-top. You won't believe they are healthy. A recipe for these will be made available soon, I promise.

Benefits of this Buttermilk pancake recipe:

Tastes amazing!
Low carb
High fiber
Sugar free
Gluten free
High protein
Curbs cravings
Aids in weight loss
Helps blood sugar levels stay even
Good for athletic training
Can make dry pancake mix in advance
Can make pancakes in advance and freeze them


First get out all your ingredients first and pre-weigh them (weighing is best for consistency).

Putting together this dry pancake mix is SO worth the effort. You can easily make a bulk batch of this pancake mix. Just make sure you weigh everything accurately. When you are ready to make some pancakes, all you do is add some fresh buttermilk and egg. They are easy to mix up, easier to cook, and the easiest to e-a-t.

Your kitchen will smell wonderful as these cook. You and your family will feel satisfied for a long time after you eat these pancakes. They are high in fiber and high in protein too. These are also helpful for those who are aiming to slim down. They even taste great with just butter and no syrup. Most fake pancakes have to be drowned in syrup to be at all palatable.

These pancakes taste even better the next day. Just refrigerated or freeze them and when you want a quick breakfast, microwave a couple pancakes a few seconds to reheat them.

We hope you enjoy this recipe for years to come!

To see the original post on our Low-Carb Pancakes, click HERE.

See a sugar-free pancake syrup HERE.

See an improved clear pancake syrup HERE. (coming soon!)


Low-Carb Buttermilk Pancakes Recipe:

Makes 4 medium sized pancakes (serves 2).

Dry Mix Ingredients:

13.0 grams (2 T.)  stirred coconut flour
11.0 grams (2 T.)  oat bran flour (finely ground)
11.0 grams (2 T.)  white almond flour (lightly packed)
8.0 grams (1 T.)  Hi-Maize brand resistant starch from National Starch **
4.0 grams (1 T.)  whey protein isolate
3.0 grams (1 T.)  psyllium husks (flakes, not powdered) ***
3.5 grams (1 t.)  gelatin powder (like Knoxx brand plain gelatin)
4.0 grams (1 t.)  Table Top Sugar Blend (or 1 1/2 t. of a 50:50 mix of erythritol and xylitol) ****
0.9 grams (1/4 t.)  BioSalt or sea salt
0.9 grams (1/4 t.)  baking powder
0.9 grams (1/4 t.)  baking soda
0.9 grams (1/4 t.)  konjac powder
0.9 grams (1/4 t.)  Wheat Bread Flavor Powder, optional (a proprietary flavoring for GF breads *)


Wet Ingredients:

1 medium egg
1/2 c. fresh buttermilk


Method:

In a small mixing bowl, sift all the dry ingredients together very well and set aside.

Preheat a 12-inch or larger non-stick skillet to 350 degrees (medium heat). Oil pan with coconut oil.

Whisk the egg until emulsified.

Add the buttermilk to the egg and mix together well.

Add the egg mixture to the dry mix in the mixing bowl and blend together until there are no lumps.

Immediately pour all 4 pancakes into the prepared skillet. Let them cook without shaking the pan.

The pancake batter quickly becomes thick, so they will not bubble like thinner pancakes do to indicate when to flip them over. You'll need to peek at the bottoms, and flip them when they turn nicely brown.

Cook the other side until they are golden brown and spring back in the center when lightly touched.

If you did not cook all the pancakes at once, do not stir the batter down. Just portion it with a food portioning scoop (an ice cream scoop) onto the oiled skillet. You may gently pat down the batter a bit with wet fingers. Again, do not shake the pan to settle the pancakes or they will be misshapen.

Enjoy with butter and a good sugar-free syrup or preserves.


Buttermilk Pancake Variations:

These pancakes are the ultimate when fresh buttermilk is used. However, that being said, all the rest of these variations taste terrific. I like to have a lot of versatility in my recipes, so that you can use what you have on hand. There are other variations too, like using unsweetened soy or almond milk.

1. With reconstituted buttermilk powder

Instead of fresh buttermilk use:
4 t. powdered buttermilk
1/8 t. guar gum
1/2 c. water

Mix together the powdered buttermilk and guar gum. Mix with the water to form a buttermilk. add to the medium sized egg and beat until foamy. mix into the dry pancake mix above.

2. With Powdered milk

Instead of fresh buttermilk use:
4 t. Non-Instant powdered milk
1/8 t. guar gum
1/2 c. minus 1/2 t. water
1/2 t. apple cider vinegar or fresh lemon juice

Make your own sour milk by first mixing the powdered milk with the guar gum. Then mix the dry milk mixture into the water and vinegar. Let this sit about 5 minutes. Proceed to mix it with the beaten egg and add this to the dry pancake mix.


3. With fresh milk

Instead of fresh buttermilk use:
1/2 c. minus 1/2 t. fresh organic milk
1/2 t. apple cider vinegar
1/8 t. guar gum (mix with the dry ingredients)

Mix the milk and vinegar together and let it sit while you whisk your egg and get the pan ready. Proceed with the recipe above.


Tips: 

You may double the recipe and use only 1 extra-large egg.  It works fine if you use a 2-burner sized skillet to cook all 8 pancakes at once. 


Notes: 

*  "Wheat Bread Flavor Powder" is a proprietary flavor my mother created for all gluten free bread-type products. It is not available to the public (unless we get a large amount of requests for it...). You may add a touch of real butter flavoring instead,,,

** Honeyville grain carries the HiMaize Resistant starch. This ingredient is not absorbed like regular starch and is a wonderful ingredient for low carb, gluten free baking. You can use up to 25% HiMaize in your flour blends to cut carbs.

*** If you do not have the 1 T. psyllium husk flakes, substitute with 1 teaspoon psyllium husk powder. The texture will not be quite as bread-like, but it is still good.

**** You may substitute Lakanto white sugar substitute for the tabletop sugar blend called for.

Looking for bubbles in these cooking pancakes is not an indicator of pancakes being ready to flip. Check the bottoms for doneness.

Lower heat is needed for cooking these pancakes, compared to regular starch-filled pancakes. Too high a temperature will burn the outsides before the insides are cooked through.

Grind the oat bran until very fine, unless you want more texture to your pancakes.

Making these pancake with just liquid egg whites is not a good idea. They won't act like, look like, or taste like pancakes at all.

Mixing in an additional t. dry egg white protein powder resulted in rubbery, eggy pancakes. Don't do it.

Using less oat bran flour results in a pancake with compromised texture. We do not recommend less than 2 T. oat bran flour for this recipe.

The added gelatin makes a nice, flexible pancake, nearer to a wheat-like texture.

Whey protein isolate is higher in protein and has mush less lactose in it than whey protein concentrate, and usually the lactose-intolerant can eat it in this recipe.

Shaking the pancake batter in the skillet will result in flattened pancakes that may also run together. Just pour them, or portion them with a food portioning scoop (ice cream scoop). If the batter has thickened a lot, gently pat the pancake batter down a tiny bit with wet fingers.


Pictures of the process:


Preheat the griddle with coconut oil.

Mixing the wet ingredients into the dry pancake mix.

Stir until there are no lumps.

Use the pancake batter immediately after mixing.

Portion pancakes with an ice cream scoop.


Flip when the pancakes are golden brown underneath.

Cook until the second side is golden brown. Pretty, aren't they?

Butter the fluffy pancakes.

Top with home made sugar-free syrup.

Dig in!

YUM

YUM..


Enjoy! 

Leila & Nancy.

Copy-Cat La Casita Chicken Salad

La Casita Mexican Restaurant has a delicious yet simple chicken salad that I have duplicated here.


I've posted earlier about one of my favorite Mexican restaurants in Springville, Utah, La Casita. The restaurant is a quaint hole in the wall but the food is great. I have often ordered this salad. It is a simple salad, yet I love it.

Here is a rare instance where I will use a commercially prepared salad dressing.

This salad is super easy to make at home. I like to gently poach a batch of chicken breasts and then chill them in their poaching liquid. Then the chicken is ready for quick meals later.

A trick for tasty poached chicken is to season your poaching liquid. You can even brine your chicken first in this liquid before cooking it.

Here is another post where I write about poaching chicken that you might like: On-The-Go Grilled Chicken Strips


Copy-Cat La Casita Chicken Salad Recipe:

Serves: 1

1 Poached skinless, boneless chicken breast
1/2 head Chopped romaine lettuce (or mixed greens)
1 Diced fresh tomato
1/2 c. Shredded Jack and Cheddar cheese
House Dressing (Kraft Zesty Italian dressing & marinade)
Black olive, as a garnish


Method:

To poach chicken breasts:

Place chicken breasts into a large pot and pour enough cool water to cover the chicken breasts by at least a couple of inches.

Season the water with some salt, black pepper, garlic powder and onion powder, to your liking.

Place the pot on the stove and turn the heat to medium and bring up to a boil. As soon as it comes to a boil, turn down to a gentle simmer and simmer just until the meat is tender and no longer pink inside. Do not cook the chicken in boiling water or your chicken will become tough.

Let the chicken cool down a little bit before placing meat in a storage container. Pour warm poaching liquid over the chicken in the storage container, until the meat is fully immersed. Cover tightly and chill completely.


To make the salad:

When it is time to make the salad, pull out 1 poached chicken breast and dice it into bite sized pieces.

Pile the lettuce on a serving plate. Top with the diced tomatoes and chicken. Top with cheese.

To serve, drizzle the salad with the house dressing and top with an olive.


Note: The House dressing listed on La Casita's menu now is Ranch. The house dressing they served a few years ago, is what I prefer, and it is Kraft's Zesty Italian.


Here's a secret: 

La Casita restaurant drizzles just a hint of Zesty Italian Salad dressing on all their tacos too. This adds an extra flavor dimension that most restaurants don't have, and it is delicious.


Our recent visit to La Casita below:


My husband Ordered a chimi.

I ordered Chicken Taquitos with verde sauce

My husband enjoyed his Chimi!

Chips and salsa for the road...


Enjoy,

Leila

Wednesday, May 13, 2015

Healthified Raspberry Fool (and a healthy Ice Cream recipe)

This is an easy and decadent treat you can feel good about eating.


This version of Raspberry Fool is a delicious super creamy, lower fat, higher protein, and sugar free version of the traditional Raspberry Fool, which is usually made with sweetened vanilla whipped cream and lightly crushed raspberries.


Enjoy this as a great low-carb snack, breakfast, or dessert. It's great for people wanting to slim down but still want a decadent treat. The fat content here is very satisfying while the protein balances it out perfectly.


Healthified Raspberry Fool Recipe:

Base:

1 part Organic sour cream
2 parts Greek yogurt
Powdered Lakanto sweetener, to sweeten to taste (or powdered erythritol)
Real vanilla extract, to taste

Fruit:

Chia Blackberry Jam (or crushed strawberries, blackberries, or other soft fruit or berry)


Method: 

Mix the Chia Blackberry Jam into the yogurt base, to taste and eat.


Tip: Also try with our Chia Blueberry Sauce recipe!


For Instant Berry Ice Cream:

This was one of my mother's early childhood discoveries, which has wonderful memories for her. she still loves it to this day. Sugar was originally used, but now she uses powdered erythritol or xylitol, and you can further enhance the sweetness with a couple drops of stevia glycerite, if desired.

Crush the berries with sweetener &/or jam of choice then freeze in a shallow layer (so it's easy to break up) until semi-hard.

At serving time, mix the nearly frozen fruit with sweetened vanilla whipped cream.


Enjoy,

Leila & Nancy.

Baking Sugar & Table-Top Sugar Substitute - The preferred Sugar-Free blend for the table in our homes.

This is the sugar-free blend we use the most for sprinkling onto berries, grapefruit, for making cinnamon sugar,  sweetening herbal tea, and other typical table sugar uses.

Kitchen Cheetahs Baking & Table-Top Sugar Substitute.

You can feel good about using this healthy sugar substitute. Our formula is better than Truvia, Just Like Sugar, Sweet Perfection, and other sugar-free blends of this nature. The reason why is because the blend of low-carb sweeteners we put in this formula are synergistic, so they enhance each other and taste more like real sugar.

The xylitol has anti-cavity properties, the erythritol has next to zero carbs, and the IMO is basically all an easily digestible fiber.

Our favorite Table-Top Sugar Substitute.

The xylitol, erythritol, and IMO powders alone are not sweet enough. We add stevia, a natural plant sweetener to amp up the sweetness level. You can adjust the amount of stevia used to suite your tastes (from 3 to 5 grams stevioside). We like to make this blend sweeter than normal sugar, so that we don't have to use as much. We want to caution you however to use only a tiny amount of stevioside powder. It is very potent and too much can create off-flavors in your sweetener blend.

2 tablespoons (20 g) of this sweetener mix has only 0.3 grams of sugars from the IMO. Note that less than 0.5 grams of sugar per serving is considered "sugar-free" as far as nutritional labeling is concerned.

We will be doing much more formulating with this sugar substitute blend. We will be trying everything from baking brownies, cakes, cookies, and more. I will be doing tests with conventional tried-and-true recipes, where I only convert the regular cane sugar called for to this sugar substitute. We will see how this reacts with regular gluten containing baked goods. We are looking at texture, flavor, moisture, rise, and all the other things conventional sugar does for baked goods.

It is interesting to note that erythritol by itself has drying, firming, cooling characteristics, IMO powder on the other hand is very hydroscopic, warming and softening. Xylitol is cooling but texture wise it's pretty much in the middle. Our sweetener blend evens out all of these characteristics, making it more balanced for baking purposes.

Of course we will be testing many clean eating gluten-free recipes too, since this is our specialty! We will post many future recipes here, so keep checking back, things move fast around here!

Do you want to know why this blog is named Kitchen Cheetahs? 

I talk about my amazing mother a lot here. Iv'e shared with you the fact that she is a very successful professional food formulator. Well, one day, after I could hardly keep up with her and all her advancements on our Jiffy Cakes (she came up with almost 10 jiffy cake and muffin recipes in about 2 days), I exclaimed, " Mom. you move so fast! You are a Kitchen Cheetah!" We laughed and the name stuck.

I want to let you know that we are working on compiling healthy cook books. Our blog, Kitchen Cheetahs is picking up speed. It is fun seeing the growth and support we are gaining. Thank you for being a part of this growth. We aim to make the world a better place through our efforts. I know it's just good food, but... Who doesn't need to eat?

Please feel free to leave us comments on what kind of cook books you would like.

We are thinking about cook book collections like:

Muffins (Gluten-Free & Low Carb)
Cakes (Gluten-Free & Low Carb)
Sugar-Free Candy Making
Meal Replacement Drinks
Low Carb Breakfasts
Salad Dressings
Herbal Teas
and more...

At this point, we are seeing how things naturally evolve.


.
Here is a yummy recipe using this sweetener: Crazy Good Low-Carb Pancakes.


Mom's Baking Sugar & Table-Top Sugar Substitute Formula:

Yield: 455.00 grams total, about 3 1/2 cups.

150.00 grams  xylitol (1x) *
150.00 grams  erythritol (1x) *
150.00 grams  IMO powder (not Inulin)
5.00 grams  white stevioside powder (80 to 90% strength) (stevioside intense sweetener)


Method:

Stir and sift everything together several times to totally blend so that there are no pockets of stevia in the mix.

Store air-tight. We like to store in a glass canning jar with the metal screw on lid. IMO loves to absorb moisture!


* (1x) - This means that the sweetener has been ground one time in a VitaMix blender (preferably the sweetener was frozen first, allowing it to be ground finer before heating up).


Tip:

An alternate method of blending the sweeteners is to:

Mix the xylitol, erythritol, and IMO powder together in a VitaMix blender on low speed.

Add the white stevioside powder to the sweeteners in the VitaMix and put the lid on tight.

Start blending on low speed, turning up to grind to a finer texture. Do not let the sugars heat up in the blender. Let the dust settle before removing the lid.


Tip:

You may use Lakanto's white sugar substitute instead of plain erythritol if you want to. It has a very nice taste and contains erythritol enhanced with their sweet monk fruit extract, so it is sweeter than erythritol alone. Adjust the stevia extract you add to the syrup to suit your tastes.


German Pancakes sprinkled with our homemade sugar-free Powdered Sugar.
To make this Powdered Sugar yourself - See THIS Post.


Enjoy!

Leila & Nancy.


The Best Sugar-Free Powdered Sugar (2 Versions) Homemade Copy-Cat Recipe

You can now make your own sugar-free Powdered Sugar. 


Granulated sweeteners do not work for making frostings and sweetened whipped cream. Sugar-free granular sweeteners are especially gritty and are harder to dissolve than regular cane sugar. Have you noticed?

We have provided 2 formulas for you: 

The first one uses resistant starch to facilitate grinding and to add fiber and reduce carbohydrates. We like to use this first version in chocolate frosting.

The second formula has the addition of coconut flour, which gives more body to the powdered sugar. We like to use this second formula for all flavors of frosting other than chocolate.

You can use this either of these powdered sugar blends in sweetened whipped cream, icings, cheesecake fillings and other sweet sauces too, or just dip fresh ripe strawberries in it!


Mom's Powdered Sugar Substitute Formula:

150 grams  xylitol
150 grams  erythritol
30 grams  Hi-Maize Resistant Starch
3 grams  White stevia powder, 80% to 90% strength (stevioside intense sweetener)


Method:

Mix the xylitol and  erythritol together and seal in an air-tight bag.

Place the bag in the freezer to chill before grinding.

Pour cold sweetener mix into a VitaMix blender.

Add the stevioside powder and the Hi-Maize starch to the blender. Secure lid tightly.

Start blending on low speed, turning up to grind to a fine texture.

Do not let the sugars heat up in the blender.

Let the dust settle before removing the lid.

For a very fine powdered sugar, repeat the freezing and grinding process 4 to 5 times, or until it is as fine as you'd like. (We like it very finely ground!)

Taste for sweetness, maybe adding a little more stevia if desired.

Store air-tight in your pantry.


Tips:

This blend tastes even better if you use Lakanto's white sugar substitute instead of plain erythritol. Use less stevia extract when using the Lakanto sweetener.

If you do not have Hi-Maize yet, you may use potato starch, tapioca starch, or non-GMO corn starch. It won't be a low-carb starch like Hi-Maize is, but you will still get the job done.

We like using Hi-Maize because then you are not eating so much sugar alcohols in one sitting, and it contributes fiber as well. Hi-Maize is very neutral tasting and smooth textured.

We do not add IMO powder to this powdered sugar blend. IMO is very hydroscopic and prone to clumping. Frosting made with IMO tends to soften and sort of melt down over time.

Freezing your sugars allows you to grind them longer before they heat up and start melting.


Note:

If the powdered sugar doesn't taste sweet enough to you, you may add up to a total of 5.0 grams of the 80%-90% pure stevioside powder to either of these powdered sugar formulas. 


Variation:

Measure all of the ingredients above as called for and then add:

10 grams of organic coconut flour

Process the powdered sugar in the same way, as above.

Use this coconut enriched powdered sugar when making a frosting without cocoa powder, because it gives more substance and body to the frosting that the cocoa powder would otherwise add.  This makes a delicious sugar-free cream cheese frosting or vanilla frosting.The added coconut flour adds more body to the frosting, so the frosting holds up better at room temperature.


Enjoy,

Leila & Nancy

Tuesday, May 12, 2015

Crazy Good Low Carb Pancake Recipe - Gluten free, Sugar Free & FLUFFY!

We nailed it! We now offer you the recipe for the best wheat-free pancakes on the planet. I kid you not my pretties.

Amazing 'healthified" light & fluffy Low-Carb Pancakes!

My mom and I had a lot of fun working together on this one. We are very synergistic when we collaborate together. We mind meld and stuff, it's great.

She teaches me, and she tells me I teach her too. But personally, I think I only teach her stuff that's a variation of the stuff she first taught me. She may disagree on that point, however, I ask you this:

What came first, the chicken or the egg?

I can answer that one, "The Chicken".   Not that my mom is a chicken.

My point is, I am very grateful for how my mother has raised me and for what she has taught me. I feel she is woven into my very fabric. She still teaches me the most amazing things (like what makes the best flour substitutes, or how to make a heart-calming herbal tincture, or insights on the power of personal prayer). Happy Mother's Day again mom!

Anyway, the chicken came first. Because of my mom, you can now make the best healthy pancakes ever.

The ingredient list is a very creative one. We use several types of "flours" to get the flavor and texture of these pancakes right. Remember, we are professional food formulating maniacs, along with being gluten-free specialists and sugar-free specialists. I say this because I want you to know that we have done more than our fair share of formulating this kind of thing. You get to benefit from our years of trials, and years of learning about the properties of the newest healthy raw materials. Cool, huh?

For you, we wanted to create variations that use ingredients that are readily available to the consumer. This narrows our list of cool (and healthy) ingredients substantially. We have tried many variations and proportions with several different ingredients, and this is where we arrived.

We are excited to share this recipe with you because the recipes we found "out there" were not what we were hoping for. (See my Pancake Bedtime Story post) They were rubbery, way too eggy, soggy, spongy, slimy, gritty, heavy, mushy, bitter, fell apart, contained sugar, Were starch-laden, tasted like yucky protein powder, or otherwise weird tasting and weird textured. I'll skip breakfast, thanks!

But now, we can all enjoy light and fluffy guilt-free pancakes, and our family won't pull faces and run away hungry.

It is worth the effort to acquire all the ingredients we list here. If you have already been cooking with gluten-free, low-carb, paleo, or sugar-free recipes, you will already have most, if not all the ingredients for this recipe. You can even make this mix in bulk. We will post a bulk pancake mix recipe later, so please check back soon.

Benefits of this pancake recipe:

Tastes amazing!
Low carb
High fiber
Sugar free
Gluten free
High protein
Curbs cravings
Aids in weight loss
Helps blood sugar levels stay even
Good for athletic training
Can make dry pancake mix in advance
Can make pancakes in advance and freeze them


First get out all your ingredients first and pre-weigh them (weighing is best for consistency), or you can just measure them until you get yourself some good kitchen scales.

Again, putting together this dry pancake mix is SO worth the effort. When you are ready to make some pancakes, all you do is add some water and egg. They are easy to mix up, easier to cook, and the easiest to e-a-t.

Your kitchen will smell wonderful as these cook. You and your family will feel satisfied for a long time after you eat these pancakes. They are high in fiber and high in protein too. These are also helpful for those who are aiming to slim down. They even taste great with just butter and no syrup. Most fake pancakes have to be drowned in syrup to be at all palatable.

See the next version of pancakes we created, Buttermilk Pancakes, HERE

We hope you enjoy this recipe for years to come!


Low Carb Pancake Recipe:

Makes 4 medium sized pancakes (serves 2).

Dry Mix Ingredients:

13.0 grams (2 T.)  stirred coconut flour
11.0 grams (2 T.)  oat bran flour (finely ground)
11.0 grams (2 T.)  white almond flour (lightly packed)
8.0 grams (1 T.)  Hi-Maize brand resistant starch from National Starch **
4.0 grams (1 T.)  whey protein isolate
3.0 grams (1 T.)  psyllium husks (flakes, not powdered) ***
3.5 grams (1 t.)  gelatin powder (like Knoxx brand plain gelatin)
4.0 grams (1 t.)  Table Top Sugar Blend (or 1 1/2 t. of a 50:50 mix of erythritol and xylitol) ****
1.2 grams (1/4 t.)  BioSalt or sea salt
2.8 grams (1/2 t.)  baking powder
0.9 grams (1/4 t.)  konjac powder
0.9 grams (1/4 t.)  Wheat Bread Flavor Powder, optional (a proprietary flavoring for GF breads *)


Wet Ingredients:

1 medium egg
1/2 c. cool purified water


Method:

In a small mixing bowl, sift all the dry ingredients together very well and set aside.

Preheat a 12-inch or larger non-stick skillet to 350 degrees (medium heat). Oil pan with coconut oil.

Whisk the egg until emulsified.

Add the water to the egg and mix together.

Add the egg mixture to the dry mix in the mixing bowl and blend together until there are no lumps.

Immediately pour all 4 pancakes into the prepared skillet. Let them cook without shaking the pan.

The pancake batter quickly becomes thick, so they will not bubble like thinner pancakes do to indicate when to flip them over. You'll need to peek at the bottoms, and flip them when they turn nicely brown.

Cook the other side until they are golden brown and spring back in the center when lightly touched.

If you did not cook all the pancakes at once, do not stir the batter down. Just portion it with a food portioning scoop (an ice cream scoop)

onto the oiled skillet. You may gently pat down the batter a bit with wet fingers. Again, do not shake the pan to settle the pancakes or they will be misshapen.

Enjoy with butter and a good sugar-free syrup or preserves.


Notes: 

*  "Wheat Bread Flavor Powder" is a proprietary flavor my mother created for all gluten free bread-type products. It is not available to the public (unless we get a large amount of requests for it...).

** Honeyville grain carries the HiMaize Resistant starch. This ingredient is not absorbed like regular starch and is a wonderful ingredient for low carb, gluten free baking. You can use up to 25% HiMaize in your flour blends to cut carbs.

*** If you do not have the 1 T. psyllium husk flakes, substitute with 1 teaspoon psyllium husk powder. The texture will not be quite as bread-like, but it is still good.

**** You may substitute Lakanto white sugar substitute for the tabletop sugar blend called for.

Looking for bubbles in these cooking pancakes is not an indicator of pancakes being ready to flip. Check the bottoms for doneness.

Lower heat is needed for cooking these pancakes, compared to regular starch-filled pancakes. Too high a temperature will burn the outsides before the insides are cooked through.

Grind the oat bran until very fine, unless you want more texture to your pancakes.

Making these pancake with just liquid egg whites is not a good idea. They won't act like, look like, or taste like pancakes at all.

Mixing in an additional t. dry egg white protein powder resulted in rubbery, eggy pancakes. Don't do it.

Using less oat bran flour results in a pancake with compromised texture. We do not recommend less than 2 T. oat bran flour for this recipe.

The added gelatin makes a nice, flexible pancake, nearer to a wheat-like texture.

Whey protein isolate is higher in protein and has mush less lactose in it than whey protein concentrate, and usually the lactose-intolerant can eat it in this recipe.

Shaking the pancake batter in the skillet will result in flattened pancakes that may also run together. Just pour them, or portion them with a food portioning scoop (ice cream scoop). If the batter has thickened a lot, gently pat the pancake batter down a tiny bit with wet fingers.


Tip: 

I doubled the recipe because all I had were extra-large eggs. I used 1 extra-large egg.  It worked fine, although the 2nd batch of pancakes were more ragged looking because the batter had thickened up and I did not pat the batter down with wet fingers. Not the end of the world, they still turned out great!


Photos of the process:


Mix the dry ingredients together first.

Whisk the egg then add in the water.

Add the egg mixture to the dry pancake mix.

Mix until no lumps remain.

Using a food portioning scoop to measure out each pancake, without deflating the batter.


I flipped the pancakes with an unusual amount of grace... Not.

A nice fluffy stack of pancakes.


That was so good! :)


Enjoy!

Leila & Nancy.