Showing posts sorted by relevance for query biosalt. Sort by date Show all posts

Thursday, January 29, 2015

Wake up your taste buds with this Perfectly Seasoned Quinoa recipe

Perfect Seasoned Quinoa

Cooked Quinoa
This is a flavorful and healthy gluten-free side dish created by my mom. Use as a great replacement for white rice, pasta or Bulgar... You will want to make this again and again.

Soaking and then sprouting the quinoa heightens it's nutritional value and removes all of the quinoa's bitterness and enzyme inhibitors you can sometimes taste. This also makes the quinoa very easily digested and its vitamins and minerals more absorbable. If you don't want to make time to barely sprout the quinoa, just soak it a little while and then rinse very well. This will remove much of the bitter saponins (soapy-tasting) from the quinoa.  A lot of people don't know about soaking and rinsing quinoa, and then they often dislike the bitterness of it as a result. I like to place the quinoa in a large fine-mesh strainer immersed in a large bowl of water. This makes it very easy to rinse and drain. You can even let it sprout overnight this way.


PERFECT SEASONED QUINOA Recipe:

1 c. barely sprouted quinoa (or regular quinoa, soaked and rinsed if in a hurry)
1 c. purified water

Seasoning Mixture:

1 T Tamari soy sauce (it's gluten-free)
1 T. olive oil or "GREEN OIL" (recipe on this blog)
1 T. UDO'S OIL or "GOLDEN OIL" (recipe on this blog)
Several drops orange essential oil, to taste
1 drop lemon essential oil
BioSalt to taste (recipe on this blog)


Method:


To sprout the quinoa:

First place the quinoa into a large fine-meshed strainer. Fill a large bowl with water and place the strainer inside, so that the quinoa is fully immersed. Soak the quinoa 30 minutes to remove the bitter saponins. The water will become discolored. Rinse the quinoa, then soak again overnight. Rinse and drain. With the drained quinoa still in the strainer, place back over the now empty bowl and cover with a clean dish towel. In about 6 hours it will have sprouted short tails.

To prepare the quinoa:

In a medium sauce pan, pour 1 c. water and bring it to a boil.
Once boiling, add the quinoa.
Reduce heat and simmer, covered for 20 minutes.
Fluff with a fork. Cover and let stand 20 minutes.

To season the quinoa:

Mix the Tamari, oils and essential oils together. Drizzle this oil mixture over the warm quinoa and toss together well, adding BioSalt to taste.

Serve.


Sprouted Quinoa
Note: You can use raw sprouted quinoa in many ways: As a base for taboulli and other salads, as a garnish or topping, on omelettes, in fruit smoothies and fresh vegetable juices or green drinks.


Enjoy, 

Leila

Thursday, February 12, 2015

Creamy Baba Ganoush Recipe (Low-Carb)

Creamy Eggplant Pesto (Baba Ganoush)


This delicious, smooth, and creamy Baba Ganoush recipe is low-carb, sugar-free, and gluten-free.

Use this as a dip for vegetables, as a spread, or serve as a side. YUM.

We enjoy eating this very much with the classic Quinoa Tabouli recipe posted on this blog. It makes a great lunch to prepare in advance and take to work.


BABA GANOUSH Recipe:

1 1/2 to 2 c. prepared, grilled eggplant
1/2 c. raw tahini (drained of excess oil)
4 ounces organic Neufchatel cheese, softened
1 T. Bakon Yeast Hickory Smoke Seasoning
1/4 t. toasted cumin powder
1 t. garlic powder (or roasted or caramelized garlic, to taste)
1/4 t. finely ground psyllium husk powder, to thicken, optional
A pinch white pepper
A pinch cayenne pepper powder
1 t. toasted sesame oil
BioSalt or sea salt, to taste (BioSalt recipe on this blog)
3 T. fresh lemon juice, to taste (do not make tart!)
2 T. fresh minced parsley


Method:

Cut eggplants in half lengthwise and grill on an outdoor BBQ (for a nice smoky flavor) just until soft.

Cool eggplant, then scrape out the flesh.

Measure 1 1/2 to 2 c. eggplant into a bowl of a food processor.

Add the raw tahini, Neufchatel cheese, Bakon Yeast, cumin, garlic, psyllium (if using), white pepper, cayenne, and toasted sesame oil. Process until a smooth, pesto-like consistency.

Add salt and lemon juice to taste. Pulse in to blend.

Stir in the minced parsley to serve.


Tip: You may season this Baba Ganoush any way you like.


Note: Bakon Yeast Seasoning is a natural way to add a smoky flavor to your foods. It is made from dried torula yeast and 100% sweet Hickory smoke. You can find this product online.


Enjoy,

Leila


Saturday, January 17, 2015

Cafe Rio Copy-Cat Cilantro Lime Rice Recipe (A healthier Version)

Cafe Rio Copy-Cat Cilantro Lime Rice Recipe

This is my version of Cafe Rio's rice. There are several copy-cat versions online, but I wanted to create one that tasted more authentic. I think the cilantro should be added after the rice is cooked, not before. Cilantro's delicate volatile oils disappear when cooked. Cooked lime juice and lime zest also looses it's brightness. The flavors are balanced in this easy recipe.

I use a rice cooker to cook the rice first. Then I stir in the cilantro, lime juice and lime zest. I put the rice on the "keep warm" setting and close the lid. In a few minutes the flavors meld beautifully.

In addition, coconut oil is a healthy oil for the body, so I chose to use that, and BioSalt is a healthier, balanced salt. You can choose either brown or white basmati rice (Cafe Rio uses white rice). I hope you enjoy it.


CILANTRO-LIME RICE Recipe:

2 c. brown basmati rice (or white basmati rice)
4 c. purified water, divided
1 t. organic chicken base
2 garlic cloves, mashed in a mortar & pestle
1 t. BioSalt (recipe on this blog)
1/2 sweet onion, chopped fine
1 T. coconut oil (deodorized 76 degree coconut oil does not interfere with the dish's flavor)
zest and juice of 1 lime
1/2 bunch fresh cilantro, finely chopped


Method:

In an automatic rice cooker, place all but the lime juice, lime zest, and cilantro.
Push down the rice cooker's COOK button.
When the rice is done cooking, fluff the rice.
Add the cilantro and the zest and juice of the lime. Toss well to mix.


Tip: I like to mash garlic with the salt called for in a recipe. The salt makes it easier to do.

Enjoy!

Leila


Wednesday, January 7, 2015

Healthy Mini Cheese Balls (Gluten Free, Nut Free & Sugar Free)

NUT-FREE MINI CHEESE BALLS

A super snack, a little goes a long way into satiety. You can vary the combinations of coatings and cheeses, to suit your taste. These work great for a low-carb, high protein mini-meal on the go. Kids like them too. They curb the munchies nicely.


NUT-FREE MINI CHEESE BALLS Recipe:

creamy cheese of choice (ie, cream cheese, neufchatel, chevre goat cheese,  thick seed cheese, etc.)

Toasted, salted pumpkin seeds or sunflower seeds (homemade with BIOSALT is best)


Method: 

Form small balls and roll to coat thickly in seasoned seeds of choice.
Place into an air-tight container and chill.


Notes: If the cheese is too firm, soften at room temperature. If the cheese is too soft, chill until workable. You may use pecans or walnuts instead if you choose.

The recipe for BioSalt is on this blog.


Enjoy,

Leila & Nancy

Tuesday, August 4, 2015

Classic Potato Salad - Flavorful and Sugar-Free

Classic Potato Salad

This classic potato salad is easy to make and very flavorful. The hot potatoes first soak up a seasoned brine so that they absorb nice flavor, and then after they have cooled down a while, the other ingredients are added.

This is one of our families favorite potato salads. It keeps very well for a few days in the refrigerator and it is a classic for summer outings and B-B-Q's.


Classic Potato Salad Recipe:

4 pounds boiling potatoes (like Yukon Golds, long whites, round Maine, red new potatoes)
1/2 c. raw apple cider vinegar
1/4 cup xylitol (or sugar)
1 T. BioSalt or sea salt
1 t. dry mustard powder, optional
1 c. minced white onion
2 c. diced celery
6 hard boiled eggs, chopped
2 c. Best foods or Hellman's mayonnaise
1 t. fresh ground black pepper
1 c. diced dill pickles or sweet hot pickles, optional
Additional BioSalt or sea salt, to taste


Method:

Scrub the potatoes and place in a large pot of cold water.

Bring the potatoes up to a gentle simmer and simmer 15 to 25 minutes, just until firm-tender.

Drain and let cool slightly.

Make the vinegar brine by mixing the vinegar, sweetener, salt, and mustard powder in a small sauce pan. Gently heat to dissolve the sugar. Taste your brine and adjust to your liking. Set aside.

When the potatoes are cool enough to handle, peel the potatoes, if desired (the peels are usually bitter), cut into 1" pieces and place in a medium-large bowl. Add the onions to the bowl.

Pour the vinegar brine over the hot potatoes and onions, and gently toss to coat the potatoes.

Let the potato mixture cool to room temperature. Or chill for a while.

Add the celery, eggs, mayonnaise and pickles (if using) and stir gently.

Serve immediately at room temperature or chill until serving time.


Enjoy, 

Leila.

Thursday, February 5, 2015

Delicious Greek shrimp recipe - Put inside lettuce wraps or pitas

Greek Shrimp Stuffed Lettuce Wraps or Pitas

Greek Shrimp Lettuce Wrap - YUM!
This a fast, delicious meal, great for weeknights when you want something extra special. Make it
low-carb and grain-free by using lettuce wraps instead of pita bread. Most feta cheese is 100% goat cheese, but check the label if you choose to avoid cow dairy.


GREEK SHRIMP STUFFED WRAPS Recipe:

Yield: 4 to 5

Shrimp Mixture:

1 pound cooked shrimp, peeled and finely chopped
4 ounces crumbled feta cheese
2 to 3 scallions, finely chopped
Fresh ground black pepper, to taste
BioSalt, to taste (recipe on this blog)

Yogurt Sauce:

1 c. plain non-fat yogurt (Greek yogurt makes a thicker sauce)
1/4 c. chopped fresh parsley and/or mint
1 clove garlic
1/2 t. fresh ground pepper
1/4 t. onion salt
BioSalt, to taste
A squeeze of fresh lemon juice, optional


Method:

Put the clove of garlic in a food processor and mince. Scrape down the sides.

Put the rest of the yogurt sauce ingredients in the food processor and process until a sauce is obtained.

Check and adjust the seasoning as needed.

Chill the yogurt sauce at least 1 hour in the refrigerator, before serving.

In a separate bowl, combine the shrimp mixture. Season to taste.

Fill lettuce wraps or pitas with the combined shrimp mixture.

Top with the yogurt sauce and serve immediately.


Note: You may garnish with lettuce, tomatoes, cucumbers, Greek olives ,as desired.

Tip: If Greek yogurt is used, I prefer to thin the sauce with some lemon juice plus a little water.


Enjoy,

Leila


The Greek Shrimp Spread

Greek Yogurt Sauce

Greek Shrimp garnished with Greek Olives.

With a pita.


Tuesday, July 7, 2015

Dad's Healthified Orange Julius - with a Secret Ingredient (Copy-Cat)

So over the top good and refreshing & good for you too!


My dad comes up with killer protein drinks. Being an athlete and trainer for athletes, he drinks protein drinks a lot. You have to mix it up a little if you drink a lot of them, or YAWN....

He makes protein drinks we WANT to drink. This is one of them, and it has a unique secret ingredient... Angostura Bitters.

As a family, we have been exploring bitters and tonics. Some people use them for alcoholic drinks, but actually bitters are old fashioned remedies for digestion and general health. We like to use them to create depth of flavor in various recipes and non-alcoholic beverages, much like you would use vanilla or almond extract. As far as bitters go, Angostura Bitters is king. It is affordable and has great flavor. It is the secret ingredient in this version of an Orange Julius. Give it a try.


Dad's Orange Julius Recipe:

Makes 2 big servings:

10 ice cubes
1/4 to 1/3 c. frozen orange juice concentrate
1/2 c. almond milk
1 scoop (3 T.) whey protein isolate
1 pinch sea salt or BioSalt
1 pinch orange flavor powder or 1 to 2 drops tangerine essential oil
stevia glycerite, to taste
Angostura Bitters, to taste


1 big serving:

5 ice cubes
2 to 3 T. frozen orange juice concentrate
1/4 c. almond milk
1 1/2 T. whey protein isolate
mini-pinch sea salt or BioSalt
mini-pinch orange flavor powder or 1 drop tangerine essential oil
stevia glycerite, to taste
Angostura Bitters, to taste


Method:

Place all but stevia glycerite and bitters in a blender and blend until smooth.

Add stevia glycerite and bitters to taste, blending in well.

Serve cold.


Enjoy,

Dad.

Friday, July 3, 2015

Summer Confetti Macaroni Salad (sugar-free)

This is a colorful classic macaroni salad with a great balanced flavor.
Summer Confetti Macaroni Salad

This pretty pasta salad makes a nice side for summer picnics and celebrations. I love having more crisp, colorful vegetables in my pasta salads. I really don't want to eat just plain macaroni slathered in mayo... If you are like me, you will love this recipe. I also like that it has enough vinegar to give it a bit of zing and enough erythritol to cut the bite of the vinegar, then our BioSalt pulls it all together.

You may use gluten-free pasta, if desired. If you are going dairy-free, omit the sour cream and replace it with mayonnaise. And of course you can adjust the diced vegetables to taste.


Leila's Summer Confetti Macaroni Salad Recipe:

1 pound pasta or gluten-free pasta (macaroni, ditalini, or small shell pasta)
3/4 c. real mayonnaise
1/4 c. sour cream (omit if dairy-free is desired and increase the mayo to 1 cup)
3 T. white wine vinegar
3 T. erythritol
1 1/2 t. dry mustard powder
1 t. sea salt or BioSalt, to taste
1/2 t. onion salt, or more to taste
1/8 t. garlic powder
1/2 t. fresh ground pepper, to taste (about 50 grinds)
2 to 4 T. fresh minced parsley, to taste
1 c. finely diced celery (4 ribs)
1 c. finely diced red bell pepper (1 whole pepper)
1/2 c. finely diced peeled carrot (1 large carrot)
1/4 c. finely diced red onion
1/2 c. minced scallions, about 6, optional
1/4 c. diced radishes, optional

Garnish:
Paprika
Cherry or grape tomatoes, halved, optional

Method:

Cook the pasta aldente, rinse and drain extremely well. Set aside to cool.
Mix the mayonnaise, sour cream, vinegar, and erythritol together, until erythritol is dissolved.
Add the mustard powder, salt, onion salt, garlic, and pepper, mixing in well.
Add the minced vegetables and then the pasta and gently mix together. Taste.
Chill overnight for the best flavor.
Taste and adjust seasoning if desired.
Garnish with a sprinkling of paprika. Top with tomatoes, if desired. Serve cold.


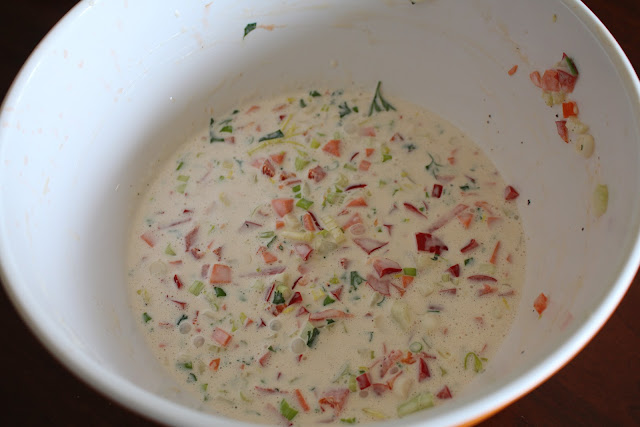
The dressing and vegetables mixed together.

Freshly mixed pasta salad.

Delicious!


Enjoy,

Leila.

Saturday, January 10, 2015

Chia Blackberry and Raspberry Sugar-Free Jam Recipes

Chia Blackberry Jam

Sugar-Free, Raw, Gluten-Free

A very easy and delicious raw-food jam that is great to use as a topping for yogurt, frozen desserts, and of course toast! Chia seeds are a great alternative to using thickening starches and large amounts of sugar. Our sweetener blend is healthy, sugar-free and chemical-free,

So slather on!

CHIA BLACKBERRY JAM Recipe:

1/2 c. WARM water
1/4 c. vegetable glycerin
2 T. IMO syrup (or other desired sweetener)
2 T. whole black chia seeds
1/2 c. powdered White LAKANTO brand sweetener (or erythritol, or xylitol, or 50/50 blend of both)
18 ounces crushed fresh blackberries
1 T. Black Cherry Concentrate, optional
1/16 t. BIOSALT, to taste
Ascorbic acid powder (Vitamin C), to increase tartness if needed, to taste
Natural berry flavor, if desired
Stevia glycerite, to sweeten taste


Method:

Blend together the warm water, glycerin, and IMO syrup.

Stir in 2 T. chia seed. As soon as it thickens (3-5 minutes), stir in your desired healthy sugar substitute, crushed blackberries, and blackberry concentrate, if using.

Adjust the flavors: Add approximately 1/16 t. BIOSALT (recipe on blog). Add to taste, the ascorbic acid, natural berry flavor, and stevia glycerite.

Allow to thicken in the refrigerator for 12 to 24 hours. Stir.

Store in the refrigerator up to one week. Freeze jam for long-term storage.


Note: 

Using 2 T. chia seeds gives the consistency of a freezer jam. 

Using 4 T. chia seeds makes a thicker jam.


Variation:


Instead of blackberries, use fresh crushed raspberries. Use white chia seeds for the raspberry jam.


Sources: 

You can buy IMO syrup online. Kitchen Cheetahs hopes to be able to provide you with IMO syrup and IMO powder at a better price, at a later date. Please contact us and let us know if you are interested.

www.bionutra.ca
www.fitnesstreats.com
www.busybuthealthy.com
www.mysweetit.com

Enjoy!

Author, Leila


Thursday, February 5, 2015

Tiger Bites - A healthy coconut-apricot sugar-free candy

Tiger Bites - A Sugar-free Candy


I love these cute little confections.  My mom made a similar version of these but I didn't have her recipe, so I recreated this version of them. They are a perfect combination of sweet and tangy. The fresh citrus brightens the flavor and they have a delightful chewy texture. Best of all, they have no added sugar!

There are sorta-similar recipes out there using sweetened condensed milk and powdered sugar. They are flat tasting compared to these.

You can feel good about serving this great tasting, sugar-free and dairy-free version to your family!


TIGER BITES recipe:

1 1/2 c. (12 ounces) dried unsulphured California apricots
3 T. (1.5 ounces) Juice of 1/2 organic orange
Zest of 1/2 organic orange (0.50 ounces)
3 T. (1.5 ounces) fresh lime or lemon juice
1 T. (0.50 ounces) xylitol (or Lakanto zero-cal white granular sweetener)
1/4 t. BioSalt (recipe on this blog)
2 c. (4 ounces) dried unsweetened coconut chips
1 1/2 c. (3 ounces) unsweetened dried coconut, finely ground, for rolling


Method:

Snip the whole dried apricots into quarters and place in a bowl of a food processor.

Pour the orange juice, grated orange zest, lime or lemon juice, xylitol, and salt over the apricots.

Let the apricots soak while you prepare everything else, or about 5 minutes.

Place the finely ground coconut in a shallow bowl and set aside.

Place the BioSalt and half of the coconut chips into the food processor with the apricots.

Blend until the mixture until it starts to look chopped.

Add the rest of the coconut chips and process until it clumps into a mass.

Taste for sweetness and tartness. adjust if necessary.

Use a stainless steel 18/8-size ice cream/portion scoop to portion out half-ounce balls.

Drop the balls in the bowl of finely ground coconut and roll to completely cover the confection.

Seal air-tight and store in the refrigerator.


Note: I drop 4 or so balls at a time into the bowl of finely ground coconut, and then shake and roll  them about until well coated.


Enjoy the sweetness of life!

Leila


Monday, February 23, 2015

Zesty Artichoke Pasta Salad (Gluten-Free) - This salad tastes great left over too!

Leila's Zesty Artichoke Pasta Salad

I get tired of blah-tasting pasta salads. Most of them are boring, have you noticed that too? I wanted a pasta salad that tasted good leftover, not just on the day it is made. I do not want an over abundance of pasta either - too many empty carbs for my taste. If I want empty carbs, let's make it worth it - give me a fudgey, chewy brownie!

A secret to great pasta salad is to marinate the hot pasta in the zesty, well-seasoned, homemade dressing first. Let the flavors infuse for a while. Then add all the other ingredients. Adjust the seasonings and serve.

I do not add cheese to pasta salad unless it will all be eaten immediately - or the cheese gets slimy :(

You can use gluten free pasta or an ancient grain-style pasta, do what works for you.

Add cheese if desired at serving time, as a garnish.

This is a versatile recipe, vary your veggies to to taste, and have fun with it.

P.S. this salad IS good left over.


Zesty Artichoke Pasta Salad Recipe:

1 lb Gluten-free bow tie pasta (or other desired shape)

Dressing:

1 1/2 Lemons, juiced (or 1 large lemon)
Zest of 1 lemon
2 to 3 Large garlic cloves
1 t. BioSalt or sea salt (recipe on blog), to taste
1 t. Fine Herbs or Herbs de Provence
1 t. Dried rosemary
1/2 t. Onion salt
1/2 t. Garlic powder, to taste
1 t. Fresh ground black pepper, to taste
1/2 c. Olive oil, or more to taste (use a high quality oil)

Salad Ingredients:

1/4 c. Finely minced onion (sweet onion or red onion)
4 Scallions, minced
1/4 c. Fresh minced parsley, optional
3 Roma tomatoes, diced
1 Red bell pepper, diced
2 c. Minced raw broccoli
2 Cans black olives, drained and halved
1 Can garbanzo beans, drained
1 to 1 1/2 c. Marinated artichoke hearts
1/4 c. Marinated sweet peppers and olives blend (from an olive bar), optional
1 c. fresh chopped basil leaves, optional

Garnish:

1/4 c. Shredded Parmesan cheese
1 c. Cubed mozzarella cheese


Method:

Cook the pasta al dente. While pasta is cooking, mix up the dressing.

Mash the garlic cloves with the BioSalt in a mortar & pestle and scrape into a large mixing bowl.

Add the rest of the salad dressing ingredients to the bowl and mix. Taste and adjust as desired.

Add the freshly cooked and drained hot pasta. Mix with the dressing and let marinate 30-60 minutes.

Mix in the rest of the salad ingredients. taste and adjust seasoning.

Chill.

Garnish with cheese if desired at serving time.


Enjoy,

Leila

Saturday, January 17, 2015

Cafe Rio Copy-Cat Cilantro Lime Vinaigrette (Sugar-Free)

Cafe Rio Copy-Cat Cilantro Lime Vinaigrette (Sugar-Free)


I love this dressing. I had to recreate it. I did side-by-side comparisons until it was right. It will last a few days in the refrigerator, but I like it best fresh. The tangy-sweet balance of flavors goes great on a Cafe Rio-style Mexican salad, and on tacos or tostadas, along with the Cilantro Lime Rice recipe. I chose to use white wine vinegar instead of white vinegar for health reasons. If you decide you want to use sugar instead of xylitol, Just replace it with an equal amount of sugar. I hope you enjoy this as much as our family does.


Cilantro Lime Vinaigrette Recipe (Sugar-Free)

2 to 3 garlic cloves, finely minced (to taste)
1 T. finely minced sweet onion (to taste)
1 large bunch cilantro with stems
Fresh lime zest from 2 limes
1/2 c. fresh lime juice (from 4 limes)
1/2 t. fresh ground coriander
1/4 c. white wine vinegar (not regular white vinegar)
6 T. xylitol (to taste) (or Lakanto zero-cal sweetener)
1 T. BioSalt (recipe on blog)
1 1/2 c. salad oil


Method:

1.  Dissolve the xylitol and BioSalt into the vinegar by gently heating together in a  microwave-safe 2-cup measuring cup 20-30 seconds. Stir until completely dissolved. Set aside.

2.  In a food processor, place the cloves of garlic, process until minced fine.

3.  Add the onion and mince fine.

4.  Roughly chop the cilantro with stems and add to the food processor. Chop fine.

5.  Add the lime zest, lime juice, and coriander. Pulse to blend.

6.  Pour in the salad oil and vinegar mixture. Process just until mixed (do not puree).


Tip: If you do store it in the fridge, let it come back up to room temperature if the oil has solidified.


Enjoy!

Leila


Saturday, June 13, 2015

Fresh Figs & Cream for Breakfast


Here is a super easy, delicious breakfast when figs are in season

This is so simple, and we wanted to bring this yummy dish to your attention.

I enjoyed eating this for breakfast at my mom's house after we went and picked figs together. I especially enjoyed taking off my sandals and climbing the fig trees to get the ripe ones on the tippy-top! We got to go harvest figs twice while I was there. So fun!

Some of the figs we picked and brought home.
Here are some "blond" figs too!
My mom calls this "Fig Mush". It's delicious, whatever you choose to call it!


Fig Mush Recipe:

Fresh figs
Organic whole milk
Organic cream
Stevia glycerite, optional
BioSalt, optional


Method:

Snip fresh figs into a serving bowl.
Pour over some milk.
Pour over some cream
Add a drop of stevia glycerite to sweeten further, if desired
Stir and add a pinch of BioSalt, if desored.


Snip the fresh figs into little bite-sized pieces.
Pour milk then cream over top. Sweeten with a drop of stevia glycerite if desired.
Blond Fig Mush.

Enjoy,

Leila & Nancy.

Friday, February 6, 2015

Amazing Quinoa Tabouli - Make ahead for quick meals

Mom's Quinoa Tabouli

This is a fabulous salad. It is flavorful, gluten-free and packed with healthy deep leafy greens. It is a salad that is hard to get tired of. You can make this ahead of time to enjoy for several meals with a side of clean protein. It's great to take as a lunch for work, or take on picnics, or just to have on-hand when you are in a hurry and need something good for you that's ready to go. The choice of foods we eat when we are in a hurry are frequently the things we regret eating later (I'm not pointing any fingers... soda and candy bar ).

This is a staple in our homes. My dad eats it every day and loves it! My mom and dad make it together and there is always some in their refrigerator. My dad has his black-belt in JUDO and instructs several Judo classes every week. This quinoa salad helps him stay lean and mean. My kids have a grandpa with a 6-pack (and I'm not talking about a 6-pack of root beer). Way to go dad!

There are delicious variations to this salad that I will post later. Note: These have now been posted:

See our Oriental-Style Quinoa Tabouli recipe.
See our Itallian-Style Quinoa Tabouli recipe.
See our Mexican-Style Quinoa Tabouli recipe.


Try this Tabouli recipe with this amazing Chicken Bake recipe HERE.


QUINOA TABOULI Recipe:

Serves 4 to 6

2 c. cooked quinoa (or cooked sprouted quinoa), cooled
1/4 c. fresh lemon juice, to taste
1/2 c. olive oil (or Green Oil recipe on this blog)
A pinch of. ascorbic acid powder (vitamin C)
1 garlic clove, pressed through a garlic press
2 large scallions, thinly sliced
2 T. dried dill weed (or fresh dill weed to taste)
2 T. dried mint leaves, crumbled (or fresh mint to taste)
1 large bunch flat-leaf Italian parsley, without coarse stems
1/2 bunch dark kale, collard or broccoli leaves, chopped fine (use half as much kale as parsley)
2 medium cucumbers, peeled, large seeds removed, and cubed small (about 1/4th-inch squares)


Garnish:

3 medium tomatoes, diced small
BioSalt (recipe on this blog)


Method:

Mix all listed ingredients together thoroughly, adding lemon juice to taste.
Pack in air-tight containers in the refrigerator.
This keeps well several days because no salt has been added yet.
To serve, salt only your individual serving, to taste.
Garnish with fresh chopped tomatoes and serve.
Remember, DO NOT ADD SALT if you plan on storing any length of time


Tips:

If dried herbs are used, the flavor may be a little flat tasting. You can amp up the flavor by adding some dried oregano plus dried basil, to taste. Or add dried oregano plus a touch of dried tarragon (tarragon is a potent herb, so a little goes a long way).

You may also grind dill seeds in a seed mill and add a touch of the powder to your quinoa.

You may also use essential oils of dill seed and/or spearmint. Do not overdo it! Touch a clean finger to the essential oil dispenser so that you have less than a drop. Rub the oil off of your finger and onto the inside bottom of your mixing bowl before the other ingredients are added. Add the salad oil and mix well, to dilute it. You don't want an essential oil hot spot in your salad! Add the rest of the ingredients and toss well.


Note:

Ascorbic acid powder added to all of your quinoa Tabouli salads has the big benefits of increasing the salad's shelf-life, keeping it fresh flavored longer. It also keeps the greens crisp and green

Adding salt or any ingredients containing salt to the quinoa salad makes the juices leach out and get watery and yucky. You will not be able to store it in the refrigerator either.

That includes cheeses, soy sauce, Bragg's Aminos, etc...

Add salt and your salty ingredients only when eating it - because it does need salt!


Enjoy!

Leila and Nancy

Thursday, June 11, 2015

Easy Sun Warrior Chocolate Pudding (Sugar-Free & Vegan)

Easy Sun Warrior Chocolate Pudding.
Here is the beginning of a series of delicious, sugar-free protein pudding recipes that you can make yourself!


We have been talking about creating delicious tasting protein-packed pudding recipes. We wanted a dessert pudding that is good for us and our families. This recipe is the beginning of these formulations. This pudding recipe is low-carb, sugar-free, gluten-free, corn-free, egg-free, dairy-free, and vegan.

My mom discovered that when you puree and heat the warrior blend protein powder with liquid, it "cooks" up to make a silky smooth creamy pudding that thickens perfectly when chilled. Vegan protein powders are not usually this smooth, it's the "cooking" process in the VitaMix that transforms it. we were thrilled to see that it also thickens up beautifully.

This recipe makes up several servings. We like cooking this way, it cuts down on the daily food prep time. Make up a bunch and get it out of the way. That's how we roll.

This recipe is very easy to make in a VitaMix high-powered blender. VitaMix is famous for being able to cook soups just by the friction caused by it's fast moving blades.

So assemble your ingredients and get ready to enjoy a guilt-free treat for breakfast, lunch, or a quick snack anytime!


Sun Warrior Chocolate Pudding Recipe:

Yield: 8 generous servings.

13.5-ounce can Full Fat coconut milk, plus HOT water to make a total of 3 1/4 cups.
1 c. Sun Warrior brand Chocolate "Warrior Blend" protein powder
1/2 c. white or purple yam or sweet potato that has been baked until soft (remove skins)
1/2 to 1 c. White Lakanto sweetener powder, to taste
1/4 c. coconut oil (deodorized makes a more chocolaty flavor)
2 T. vegetable glycerine or other liquid sweetener
2 T. xylitol (or 2 T more Lakanto)
1/3 to 1/2 c. dutch cocoa powder, to taste
1 to 3 t. black cocoa powder, optional for richer color (we like 3 t.)
2 t. real vanilla extract
1/4 t. almond extract
1/4 t. BioSalt
1 fat pinch of canella powder or ceylon cinnamon
Stevia glycerite, to taste, optional
Real chocolate flavoring, to taste, optional
Coffee flavoring, optional


Method:

Place the 3 1/4 cups liquid (coconut milk plus water) into a VitaMix blender container.Then add the 1 cup protein powder.

Put the VitaMix lid on and blend on medium speed just until combined. Turn off the blender and then scrape down the sides of the blender.

Secure the lid on tightly and process on highest speed until steaming hot and perfectly smooth. The temperature should reach at least 130 degrees F. for the pudding to have the best texture and flavor (don't go over 170 degrees). The friction of the blades heats the liquid after a short time. Measure temperature with a thermometer.

Turn off the VitaMix, remove lid and add the rest of the ingredients to the blender, except for the stevia glycerite and chocolate flavoring, if using.

Place lid tightly on and process on the highest speed until the pudding is steaming hot and smooth. Scrape down the sides as needed (with the blender turned off!). If the mixture gets a little too thick, use the "Tamper" to help it along. You may also add up to 1/4 cup more water (making a total of 3 1/2 c. liquid).

Turn off the VitaMix, Taste the pudding. Add stevia glycerite, a few drops at a time, to taste if you want the pudding sweeter. Add chocolate and coffee flavoring to taste, if you want to.

Give a final blend and taste for balanced flavors.

Portion finished pudding into serving-sized jars and store in the refrigerator. The jars of pudding also freeze well!


To Serve:

A good way to serve this is to top the pudding with sliced or broken bananas and crushed gluten-free pretzels. Pour your favorite cold, milk over top and dig in! Our favorite milks are whole organic milk, almond mylk, coconut/almond mylk, or cashew mylk.


Notes: 

If a less thick pudding is desired, add another 1/4 cup water, to make a total of 3 1/2 cups liquid used This pudding thickens more when chilled due to the coconut oil content. If the chilled pudding turns out thicker than you would like, just stir in a bit more water to suit your individual taste.

We add the canella powder, chocolate flavoring, and the coffee flavoring to the pudding to make the most of the chocolate flavor and to make the least of the pea protein flavor!


Stay tuned, a yummy butterscotch protein pudding is being perfected now!


The Sun Warrior protein powder used for this recipe.

The texture and thickness of the Sun Warrior Chocolate Pudding before chilling.

This makes 8 generous servings of protein pudding.

Sun Warrior Protein Pudding topped with Bananas, G-F Pretzels, and Whole Organic Milk.


Enjoy!

Leila & Nancy.

Wednesday, May 20, 2015

Rich Lactose-Free Milk - with many Vegan options

Here are several delicious milk alternatives suitable for just about every diet out there!


My mom has made several kinds of milk alternatives over the years. Some are dairy free and vegan. Some are nut-free. Some are made with homemade seed milks. Some are protein enriched. All of them are sugar-free.

Here is our families favorite, creamy, dairy-like beverage that is lactose-free with lots of vegan options. This basic recipe of hers offers you a lot of versatility. Play with different variations and blends of milks to find what you love best. For example, one great combination is almond and coconut milk. You can either make a sweet or neutral tasting milk, depending on what you plan on using it for.


Mom's Rich Lactose-Free Milk Recipe:

1 quart lactose free milk *
2 to 3 T. whey protein powder (unflavored and unsweetened), or more to taste
1/8 to 1/4 t. BioSalt, to taste
2 to 4 T. coconut milk powder (for a creamier taste), optional
1/4 t. stevia glycerite, to taste
A few drops of real vanilla extract
A few drops almond extract, optional


Method:

Warm the lactose-free milk or combination of lactose-free milks to 80 to 100 degrees.
Put half of the warmed milk (2 cups) into a blender.
Add the whey protein powder and coconut milk powder, and blend together.
Add the rest of the milk and blend.
Add the flavoring. (Vanilla and/or almond extract is especially good with coconut milk.)
Add the salt to taste, until the mixture does not taste "flat or watery".
Add stevia glycerite, to taste.
Chill.


* You may choose from a variety of unflavored and unsweetened lactose free milks:
Almond milk (in milk section of grocery stores)
Coconut milk (in milk section of grocery stores)
Organic Soy milk (in milk section of grocery stores)
Rice milk (in milk section of grocery stores)
Cashew milk (homemade)
Hemp seed milk (homemade)
Sesame seed milk (homemade)
Sunflower seed milk (homemade)
etc...


See our Copy-Cat Almond Breeze Recipe for an example of how to make your own nut milk.


Notes: 

You can make this milk rich and sweet enough to be similar to Half & Half.

You may add a little bit of non-GMO lecithin powder to this lactose-free milk, especially when making the vegan versions, particularly with coconut milk - It helps emulsify the fat, and adds wonderful nutrition for the nerves. Lecithin also makes the milk taste even creamier and richer.

Almond extract is the best thing we have found for complimenting the flavor of coconut, in fact going so far as to partially neutralize the coconut taste for people who do not like the taste of coconut milk.

This milk is wonderful used in many ways:

Added to hot cocoa mix
Poured over hot cereal like oatmeal
Used as a base for smoothies
Used as an ice cream base
Chilled for drinking a tall cold glass along with a side of cookies


Enjoy,

Leila & Nancy.

Saturday, February 28, 2015

Low-Carb Mashed "Potatoes" made with cauliflower - and they taste like potatoes!

REALLY GOOD Low Carb Mashed "Potatoes"
 (O.K., it's really cauliflower)


Delicious and guilt-free "Mashed Potatoes", at least that is what this tastes like... Cauliflower is the secret low-carb ingredient here!

Kitchen cheetahs has some secrets to share with you on how to prepare this dish. There may be some variations of mashed cauliflower out there, but our version is actually crave-worthy, good enough to serve to company and great for low-carb eating. You will not feel deprived eating this.


Low Carb Faux Mashed Potatoes:

2 pounds Cauliflower
1/2 c. Organic milk (or 1/2 c. organic half & half)
1 t. Onion powder (not onion salt)
1/4 t. garlic powder (not garlic salt)
2 ounces Neufchatel cheese (or light cream cheese, or vegan cream cheese)
2 T. Bamboo fiber (omit if you can't find)
1/8 t. to 1/4 t. gum blend  (ie. 50% Konjac + 50% Xanthan) (Don't over do it , or it will be gummy)
BioSalt or sea salt (recipe on this blog), to taste
White pepper, to taste


Method:

Wash the cauliflower and break off the flower clusters and cut off the stems.
Break the flower clusters into small pieces. Only use the flower clusters in this dish, not the stems.
Put cauliflower into microwave-safe dish with 1/2 c. milk or half & half.
Sprinkle with 1 t. onion powder and 1/4 t. garlic powder.
Microwave uncovered for about 12 minutes, stirring occasionally, until tender.
If  you don't use the bamboo fiber, drain the liquid out of the cauliflower and reserve for another use.
Put the cauliflower and dairy mixture into a food processor and puree until smooth.
Add the 2 ounces Neufchatel cheese and puree until smooth.
Add the bamboo fiber, if using, and gum blend (starting with the smaller amount).
Puree the mixture until fluffy. Add salt and white pepper to taste.
Serve hot, with butter, if desired.


Notes:

You may add a pinch of psyllium fiber if you want to thicken the mashed cauliflower further.

Neufchatel cheese has 1/3rd the fat, and light cream cheese has 1/2 the fat of regular cream cheese.

A favorite brand


See photos of the process:


Core the cauliflower. Do not use the core in the mashed "potatoes"

Cut off the stems too, they don't give the texture we want

Processing the cauliflower until smooth

The finished "mashed potatoes"


YUMMY!


Enjoy<

Leila & Nancy.

Thursday, May 28, 2015

Vanilla Creme Brulee Instant Pudding (No Cook, Low Glycemic, JELL-O Copy Cat Recipe)

This is a truly delicious instant no-cook pudding mix I created today, and it's lower glycemic too...


Vanilla Creme Brulee Instant Pudding.

This Vanilla Creme Brulee Instant Pudding is full-bodied and creamy. It has a decadent vanilla caramel flavor. You will be surprised that this is an instant pudding mix when you taste it! It is good enough to serve as a stand alone dessert.

This pudding has a secret, it is made with pure organic coconut palm sugar. Coconut palm sugar gives a nice caramel color, scent, and flavor to this pudding mix. It looks a lot like brown sugar, yet it is high in minerals like potassium and phosphorus. The thing that awesome about organic coconut sugar, is that it is a healthy, low glycemic alternative to other sugars like regular table sugar. It can also be used as a sweetener in beverages, desserts, and other recipes that call for regular cane sugar.

We make this pudding truly decadent by substituting some of the milk for cream, which just so happens to lower the carbs even further. Party.

Bonus: This is a true instant (no cook) pudding mix recipe you can use to replace the commercial 3.5 ounce boxed instant vanilla pudding mix called for in recipes. Party.

This is my second trial with no cook puddings. These instant pudding mixes will be evolving. I have plans to make instant protein puddings.

My goal: They have to taste good, like dessert, or I won't enjoy eating them much. I'd like to have a healthy pudding snack, say, before bed? Or maybe for breakfast. I have wanted to make delicious protein puddings/protein drink mixes for years. So now I'm going for it!

One hurdle has been how to get an instant pudding consistency without cooking it and without having to source ingredients only available to commercial food manufacturers. So this recipe is definitely progress. earlier I made a chocolate instant pudding that had a great consistency... I think I will post about my progress, then you can see how the instant pudding recipes evolve too.

See my first trial recipe of instant chocolate pudding too.


Vanilla Creme Brulee Instant Pudding & Pie Filling Mix:

3/4 c. (120 g) Organic Coconut Palm Sugar
6 T. (30 g) Ultra Gel Instant Non-GMO Modified Corn Starch (Cornaby's brand)
1 t. Lecithin granules (like Now brand)
1/8 t. (1 g) Sea salt or BioSalt (up to 2 g, to taste)


Method:

Grind the coconut sugar, Ultra Gel, lecithin powder and salt together 30 seconds until fine textured in a VitaMix blender. Let the dust settle before opening up the lid.

Store the pudding mix in an air-tight container.


To Prepare Pudding:

Liquid Ingredients:

1 3/4 c. organic whole milk
1/4 c. heavy cream
1 t. real vanilla extract
1/4 t. caramel flavoring (like Brickford brand), optional


Method:

Pour 1 3/4 cups cold milk into a mixing bowl.
Add 1/4 c. heavy cream to the milk (you may cut cream down to 2 T. and increase the milk by 2 T.).
Add 1 t. real vanilla extract and caramel flavoring, if using.
Add 1 recipe of Instant Pudding Mix above.
Using a hand mixer or whisk, blend for 2 minutes.
Let the pudding set up for 5 minutes in the refrigerator.


Photos of the process:

Organic Coconut Palm Sugar

Put the dry ingredients into a blender and grind fine, with the lid on!

Pour the wet ingredients into a mixing bowl and then add the pudding mix.

Whisk pudding ingredients together.

Adding the heavy cream to the pudding.

Whisk until smooth and glossy, and starting to thicken.

Pour into small serving dishes and chill at least 5 minutes to set up.

Top with sweetened whipped cream if desired.


Enjoy,

Leila.