Friday, July 3, 2015

Summer Confetti Macaroni Salad (sugar-free)

This is a colorful classic macaroni salad with a great balanced flavor.
Summer Confetti Macaroni Salad

This pretty pasta salad makes a nice side for summer picnics and celebrations. I love having more crisp, colorful vegetables in my pasta salads. I really don't want to eat just plain macaroni slathered in mayo... If you are like me, you will love this recipe. I also like that it has enough vinegar to give it a bit of zing and enough erythritol to cut the bite of the vinegar, then our BioSalt pulls it all together.

You may use gluten-free pasta, if desired. If you are going dairy-free, omit the sour cream and replace it with mayonnaise. And of course you can adjust the diced vegetables to taste.


Leila's Summer Confetti Macaroni Salad Recipe:

1 pound pasta or gluten-free pasta (macaroni, ditalini, or small shell pasta)
3/4 c. real mayonnaise
1/4 c. sour cream (omit if dairy-free is desired and increase the mayo to 1 cup)
3 T. white wine vinegar
3 T. erythritol
1 1/2 t. dry mustard powder
1 t. sea salt or BioSalt, to taste
1/2 t. onion salt, or more to taste
1/8 t. garlic powder
1/2 t. fresh ground pepper, to taste (about 50 grinds)
2 to 4 T. fresh minced parsley, to taste
1 c. finely diced celery (4 ribs)
1 c. finely diced red bell pepper (1 whole pepper)
1/2 c. finely diced peeled carrot (1 large carrot)
1/4 c. finely diced red onion
1/2 c. minced scallions, about 6, optional
1/4 c. diced radishes, optional

Garnish:
Paprika
Cherry or grape tomatoes, halved, optional

Method:

Cook the pasta aldente, rinse and drain extremely well. Set aside to cool.
Mix the mayonnaise, sour cream, vinegar, and erythritol together, until erythritol is dissolved.
Add the mustard powder, salt, onion salt, garlic, and pepper, mixing in well.
Add the minced vegetables and then the pasta and gently mix together. Taste.
Chill overnight for the best flavor.
Taste and adjust seasoning if desired.
Garnish with a sprinkling of paprika. Top with tomatoes, if desired. Serve cold.
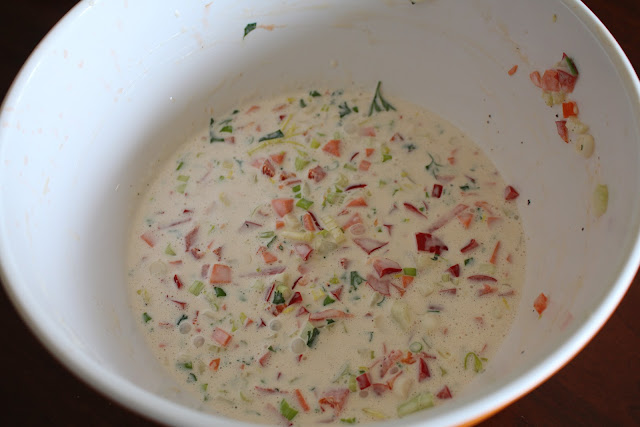

The dressing and vegetables mixed together.

Freshly mixed pasta salad.

Delicious!


Enjoy,

Leila.

Amazing Meatless Moussaka - You won't believe how good this is!

This beautiful main dish has 3 delicious layers of flavor and texture. 

This is one of my all-time favorite main dishes.The topping is so rich, creamy and wonderful, and perfectly compliments the robust tomato-based sauce underneath. The eggplant doesn't know what hit it. You will be shocked at how good the eggplant tastes here.

Eggplant seems to be the new darling in the low-carb world. Although the flour in this recipe negates that a bit...but it's SO worth it! I have not yet tried a gluten-free flour, but I see no reason why it wouldn't work.

This is a classic recipe of my mothers. I remember her serving this Meatless Moussaka to guests and it always got rave reviews. Many people swooned over this very recipe, telling her that she really must open up a restaurant. This impressed me as a child. I knew I liked her food but this is about the time that I figured out that she was a really amazing cook. I enjoyed seeing people make such a fuss over my mom. She may have had a marriage proposal or two over this recipe, I know she did over her tender buttery scrambled eggs!

If you so desire a marriage proposal, I suggest you invite your suitor over for a nice romantic dinner featuring this main dish! Even if you are already married, they may propose again!


Mom's Meatless Moussaka Recipe:

RED SAUCE:
5 c. tomato juice
3/4 t. cinnamon (you may cut to 1/2 t., if desired)
1 T. honey
1 pound minced mushrooms, browned well in 1/4 c. real butter
2 onions, chopped and sauteed until clear in 2 T. olive oil
2 t. sweet paprika
1 t. oregano
1 t. salt, to taste
1/4 t. fresh ground black pepper

MORNAY SAUCE:
2/3 c. white flour
1/2 c. real butter
4 1/2 c. milk
4 T. sherry
1 t. onion salt
1 T. Romano cheese
1 T. Parmesan cheese

EGGPLANT:
2 large eggplants, sliced in 1/2" thick rounds
beaten egg to dip eggplant slices in
oil (olive or deodorized coconut) to brown the eggplant
1/3 c. Parmesan cheese


Method:

RED SAUCE:
Combine ingredients in a sauce pan and gently simmer until thickened and flavorful.

MORNAY SAUCE:
Make a roux of the butter and flour. Cook on low 5 minutes.
Add remaining ingredients and cook gently until thick.

EGGPLANT:
Take the 1/2" round slices of eggplant and dip into the beaten egg and brown in oil on both sides.
Pat the eggplant briefly with paper towels.
Overlap eggplant slices in a 9 X 13-inch pan.
Sprinkle 1/3 c. Parmesan cheese over eggplant.


Assembly:

Pour prepared red sauce over top the eggplant in the pan and shake gently to settle the sauce.
Bake eggplant at 350 degrees, for 30 minutes.
Take out of oven and pour prepared Mornay sauce over-top.
Bake at 425 degrees, 15 to 20 minutes, or until lightly browned on top.
Serve hot.


ENJOY!

Leila.


Sunday, June 28, 2015

Yummy Sun Warrior Butterscotch Protein Pudding (Low-Carb, Vegan & Sugar-Free)

Butterscotch Pudding with Crispy Toasted Almonds and Monkey-Break Bananas.

Here It is as promised... Now you can have dessert for breakfast. 

Here is our delicious low-carb, sugar-free Butterscotch Protein Pudding recipe! First we came out with a yummy chocolate protein pudding. Next I will be posting a recipe for Vanilla Protein Pudding!

We love these puddings because they are really good for you and they are very enjoyable to eat. I feel good about offering this to my family, and you can too. Like the chocolate protein pudding, this is low-carb, sugar-free, gluten-free, corn-free, egg-free, dairy-free, and vegan.

You also get a nice dose of healthy coconut oil in this recipe. Research the virtues of coconut oil if you are unfamiliar with it's health benefits.

This pudding is silky, creamy and dreamy. You will be very surprised when you review the ingredient list. It is unusual but trust me, it's good. It is very quick to mix up a batch in your VitaMix (high-powered blender). This pudding is"cooked" just like the Sun Warrior Chocolate Protein Pudding. You can then transfer it to serving size mason jars and store in your refrigerator, and it will be ready when the cravings hit. It freezes beautifully too.


Sun Warrior Butterscotch Protein Pudding Recipe:

3 c. hot water
1 1/4 c. Sun Warrior "Warrior Blend" Raw Vegan Vanilla Protein powder
1/2 to 1 c. Golden Lakanto Zero-Calorie Sweetener, to taste
3 T. deodorized coconut oil
1 T. caramelized ghee  (or omit and just use 1/4 c. coconut oil)
1/4 c. raw cashew butter (could try roasted cashew butter)
1/4 c. Kitchen Cheetah's sugar-free maple syrup
1 c. deep orange baked yam (without skin)
1/4 t. Kitchen Cheetah's BioSalt
Kitchen Cheetah's Stevia Glycerite
Butterscotch flavor, to taste (or vanilla and butter flavor, plus rum or brandy flavor)


Method:

Place the HOT water into a VitaMix blender container.Then add the 1 1/4 cup protein powder, and 1 cup Golden Lakanto.

Put the VitaMix lid on and blend on medium speed just until combined. Turn off the blender and then scrape down the sides of the blender.

Secure the lid on tightly and process on highest speed until steaming hot and perfectly smooth. The temperature should reach at least 130 degrees F. for the pudding to have the best texture and flavor (don't go over 170 degrees). The friction of the blades heats the liquid after a short time. Measure temperature with a thermometer.

Turn off the VitaMix, remove lid and add the rest of the ingredients to the blender, except for the stevia glycerite and flavoring.

Place lid tightly on and process on the highest speed until the pudding is steaming hot and smooth. Scrape down the sides as needed (with the blender turned off!). If the mixture gets a little too thick, use the "Tamper" to help it along. 

Turn off the VitaMix, Taste the pudding. Add stevia glycerite, a few drops at a time, to taste if you want the pudding sweeter. Add flavorings to taste.

Give a final blend and taste for balanced flavors.

Portion finished pudding into serving-sized jars and store in the refrigerator. The jars of pudding also freeze well!


To Serve:

A good way to serve this is to top the pudding with sliced or broken bananas and crushed gluten-free pretzels. Pour your favorite cold, milk over top and dig in! Our favorite milks are whole organic milk, almond mylk, coconut/almond mylk, or cashew mylk.


Notes: 

This pudding thickens more when chilled due to the coconut oil content. If the chilled pudding turns out thicker than you would like, just stir in a bit more water to suit your individual taste.

We add the flavorings to the pudding to make the most of the butterscotch flavor and to make the least of the pea protein flavor!


Enjoy,

Leila & Nancy,

Authentic New York Deli-Style Potato Salad - Made Healthier and Brined for best flavor 24 hours

New York Deli Potato Salad.

Try this delicious flavor-packed potato salad for your next get together. People love it.

This type of potato salad is found in Queens, New York, Long Island, and in some Jewish or Italian delis. You don't really see it elsewhere.

Have you ever made a brined potato salad? Iv'e been doing it now for over 20 years and I keep coming back for more. The flavors deeply penetrate the potatoes when prepared this way and the result is a creamy dynamic potato salad with out having to use tons of mayo. Don't get me wrong, we love mayo around here.

It takes a couple of days to make this salad but it is well worth the effort. It continues to taste better each day too. Make sure you do not over cook the potatoes. Chilled potatoes that sill have a bite to them are perfect.

Did you know that cold potatoes contain resistant starch in them?

Do you know why that is a great thing?

Simply put, resistant starch resists being digested, resists breaking down into sugars in the body, and resists adding pounds to your body. Resistant starch is good starch.

Hot potatoes do not have this benefit. Pasta, by the way, is shown to have more resistant starch in it than hot pasta. I feel better about eating cold potatoes over cold pasta, however. Pasta is still generally white flour and/or starch and doesn't have the best nutritional value.

This recipe easily doubles.


New York Deli-Style Potato Salad Recipe:

3 to 3 1/2 pounds organic young new potatoes
1/2 cup finely minced onion, to taste
1/2 cup purified water
1/2 cup  white wine vinegar (healthier than plain white vinegar)
1/2 cup sugar (or xylitol, for a sugar-free version)
2 T. light olive oil (better than the usual canola oil)
1 T. sea salt or BioSalt
1 t. white pepper powder
1 t. dry mustard powder, optional
2 T. finely minced fresh parsley, or more to taste
1/2 to 1 cup Thick, high quality mayonnaise, to taste (Real Foods or Hellman's)
2 T minced red pimentos, optional
1 c. finely minced celery, optional


Method:

Day One:

Place cleaned potatoes into a large pot and cover with water and bring to a boil. Once boiling, reduce to a gentle simmer and cook just until a fork pierces a potato with little resistance. They should not be cooked until completely soft or you will have mushy potato salad.

Remove potatoes from stove, drain and cool in an ice bath. chill in the refrigerator until completely cold. It's easy to do this 2 days before you want to serve the salad.

Day Two:

Once potatoes are cold, halve and then slice into desired size. You can leave the skins on (I do) or rub them off.

Place the potatoes into a bowl and add the finely minced onion.

Make the hot brine by putting the water, sugar, vinegar, salt, white pepper, and mustard powder into a sauce pan and bringing to a boil, stirring just until dissolved. Remove from heat. Add the oil and taste your brine. It should have balanced flavors of sweet, savory, sour, with a pleasant heat from the white pepper and mustard powder.

Pour the hot brine over the potatoes and onions in the bowl. Toss gently to coat. Seal air-tight and chill 24 hours. I like to stir a couple times during this period.

Day Three:

The brine will be absorbed by the potatoes. If there is excess brine, drain it off. Add the minced parsley and mayonnaise to taste.

You may optionally add 2 T. minced pimentos for color and 1 cup finely minced celery for added texture.


Enjoy,

Leila.

Kamote Tops (sweet potato vines) and tasty, healthy ways of preparing them (Rejuvenating & Detoxifying).

Sketch of Kamote Tops, by Nancy Glazier.

"Bonne Sante'" is French for "good health!"

"Bonne Appetit" (good appetite!) is well known thanks to Julia Child.

It has been my experience that good fresh green Juices can contribute to both!

Where have all the bitters gone? Long time passing.... 
We have become so ensnared with sweets that most of us have forgotten about the subtle allure of the bitter edge..... 

Did you know your  body (especially your liver) actually craves bitter foods?


Sweet Potato Vines. also known as Kamote.
Why not get back in balance by cultivating an appreciation for bitter greens – they're waiting in the wings, ready to be your best friend.


Sweet potato greens are also known as KAMOTE TOPS, and are famous for building up iron levels in the blood in a natural & gentle way.

Adding a handful of sweet potato leaves to your favorite green mix- when you make your green drinks - - gives you a deep emerald green juice.... yet the taste is mild compared to a lot of other greens.

See one of our favorite green drink mixes HERE.

We were so excited to learn of Kamote, which has been a more recent discovery for our family. We love using this green in our meals. Kamote or sweet potatoes are very easy to grow in your garden. They are heat tolerant even in the hottest summers. The beautiful vines grow very quickly, so you will have a generous harvest of this delicious, versatile, and affordable green. Kamote is commonly eaten in other parts of the world, yet is virtually unheard of in the USA. It seems like our produce selection in general has become more limited than in earlier times. So, here's a shout-out to heirloom vegetables and fruits!

You can use Kamote tops as you would spinach, kale, collard greens, or Swiss chard...
They taste terrific steamed, blanched, simmered in soups & stews, used like spinach in spinach dip, in salads, lasagna... Kamote is mild flavored and delicious. If you plant sweet potatoes in your garden, you can harvest the tender tops until first frost. We like to blanch them and freeze them in meal sized portions for use all winter. One of our favorite meals is homemade Pork Chili Verde ladled over tender pinto beans and steamed kamote tops. We then top it with jack cheese and let it melt before serving.

We are sure that you will enjoy cooking with Kamote Tops too!


Perfect KAMOTE topsReady at a moments notice for my green drink.
"Heart of Green" drink, with added Kamote Tops.
Perfect! This is a great way to consume your bitters.


Bonne Appetit,

Nancy & Leila.

Wednesday, June 24, 2015

Monkey Break Bananas - A fun new way to open up a banana, and sugar-free recipe ideas using them.


Monkey-Break your bananas!
This is a fun post about a way to open and break up a banana without bruising it.

This playful method also keeps the banana from browning and oxidizing so quickly, which is really nice if you want to put the bananas into fruit salad or pies. Most importantly, it's fun to do it this way! Try it, you'll like it.

When my parents lived in beautiful Gardner Montana, a missionary from Samoa came to visit them. This is how this young Samoan ate a banana and my family has been doing it this way ever since.

Now I wonder where the Samoan learned it from...

My mom told me that many island people do eat bananas in this simple, natural way.

We named it Monkey-Break bananas because it seems like a good way for a monkey to do it, seeing that they don't usually carry around pocket knives. Please don't ask about our logic concerning this... Maybe a monkey has actually done this before...

Anyway, Monkey-Break bananas stay fresh much longer than sliced bananas because the cell walls are not smashed during cutting. My parents lived in Fiji for several seasons and they witnessed the Fijians eating bananas in this manner also.


It's not like you don't already know what to do with bananas, but here are some more ideas for you:

You can dip these monkey-break banana strips (or small squares) into gently melted Lakanto Sugar-Free Chocolate and then chill. These can keep 2 to 3 days in the refrigerator... If they last that long!

Try a chocolate banana cream pie (!) with our Sun Warrior Chocolate Protein Pudding. Use only 3 cups total liquid (instead of the 3 1/4 cups) in the pudding recipe so that the pie will be firm enough to slice.) Now we're talkin'...

Serve the broken up bananas over top a bowl of Sun Warrior Chocolate Protein Pudding and pour over some milk (dairy or nondairy). Our favorite nondairy milk is BLUE DIAMOND "Almond Breeze" Almond/Coconut Milk blend (unsweetened!). Look for it in the dairy cooler.

Serve the Monkey-Break bananas with your favorite whipped topping - dairy or nondairy. You can top with crushed gluten-free pretzels if you want... Oh yeah.


The pictures below are of my dad showing how this is done. I thought it would be nice to have his man hands on our blog. I love you dad - you always are teaching us cool stuff!


Our favorite commercial non-dairy milk.
Cool, right?
You can then break up or slice into bite size pieces, as desired. Here they are shown with our delicious, sugar-free Sun Warrior Chocolate Protein pudding.


Enjoy,

Leila & Nancy.

The Best Chicken Bake - Gluten-Free Goodness in a Pan! (And our Favorite G-F Bread)

The Best Chicken Bake!


This will become one of your favorite go-to dinners... 
This chicken is juicy and so full of flavor. It's also very easy to make. It is made all the time in our homes, and it makes great leftovers too.

I want to eat some right now...but I'm busy blogging. Grrr, where is the kitchen fairy when you need her?

We recommend pre-brining the meat before making this dish, but if you don't have time for that, don't let that stop you. Brining does make a more tender, juicy, flavorful meat, and results in less shrinkage however.

This dish can be served with practically any sides. It is one of those staple recipes that you and your family will love! You can keep it a low-carb meal by serving it with deep green leafy salads topped with sugar and starch-free salad dressings. You can alsoserve it with fresh steamed vegetables like asparagus, green beans almondine, artichokes and garlic butter sauce, sauteed summer squash...

Juicy and perfectly cooked flavorful chicken.


The Best Chicken Bake Recipe:

4 to 5 skinless boneless chicken breast halves, trimmed of visible fat. Rinse well and pat dry
1 T. olive oil
Onion powder
Garlic powder, optional
Italian herbs
Fresh ground black pepper
2/3 to 3/4 c. high quality full-fat real mayonnaise
1/2 c. Parmesan cheese (or a mix of Parmesa, Romano, and Asiago cheeses)
1 c. "Against The Grain" gluten-free fine baguette crumbs


Method:

Optional: First brine the raw chicken about 1 hour in 1 cup water with about 1 T salt dissolved into it. I like to seal the brining meat in a Zip-Lock bag, with the air removed. Rinse the brined meat thoroughly 3 to 5 times to get rid of all the extra salt, or the meat will be too salty.The chicken will shrink less when cooking if you brine the meat first.

Spread 1 T. olive oil onto sides and bottom of a 9" x 12" heavy baking dish. Sprinkle the oiled dish lightly with onion powder and Italian herbs.

Pound the chicken breasts with a mallet until about 2/3-inch thick. All breast meat should be as evenly thick as possible for even cooking.

Snuggle the pounded chicken breasts side by side in the prepared pan to form an even layer.

Sprinkle lightly with a little more onion powder and Itallian herbs and grind on black pepper.

Top the chicken breasts with the full-fat mayonnaise, using from 2/3 to 3/4 c. total. Spread onto the chicken, like frosting a cake with a modest amount of frosting. (We don't recommend reduced fat mayonnaise, we do not think it turns out as well.)

Grind the "Against The Grain" bread crumbs in a food processor to a fine crumb.

Mix 1 cup of the bread crumbs with 1/2 cup Parmesan cheese ans mix together. You can try other gluten-free bread crumbs, but if you do, use 1 cup crumbs to 1 cup cheese.

Bake in a 350 degree preheated oven until golden brown, about 30 minutes, or until breast meat just reaches 150 to 155 degrees F.

Remove from oven and let rest 10 minutes before cutting into.

Serve hot.


 Photos of the process:


Pound chicken with a pounding mallet.
Place chicken in pan coated in oil and seasonings.
Top Chicken with more seasonings.
This is the amount of mayonnaise we like on the chicken.
Here the chicken is frosted with mayo.
The proportion of bread and cheese that we like.
Make the gluten-free bread crumbs.
Pulsing the bread in a food processor to make the crumbs.
The finished bread crumbs.
Before baking the chicken.
A finished batch of baked chicken.
A close-up of the crispy edges.
Another batch after baking the chicken. Looks good, huh?
Chicken Bake or Chicken Cake...That is the question.


Here is our favorite brand of baguettes, Against All Grain from The Gluten Free Gourmet:

Our Favorite brand of Gluten-Free Baguettes, used for the crumb coating.

The G-F Baguette label.
The G-F Baguette ingredient list.
This is my dad ready to dig in! See the Quinoa Tabouli Salad recipe shown HERE.


Enjoy,

Leila & Nancy.