Saturday, April 4, 2015

The PERFECT Burger! Plus how we do Oven Fries

I'm not kidding
This is the best grilled burger ever!

A perfect grilled burger with crispy oven fries...and topped with a sesame seed bun :)

Perfect oven fries.
My husband is the real Burger King. Just sayin'

This is a simple but amazingly delicious all-american dinner. But you know that already.

One of my husband's secrets is to put a hole in the center of each raw hamburger patty. This helps it cook quicker and more evenly. As a result, the meat does not shrink and mound up as much while cooking. He also seasons the meat generously, so they have great flavor too. We get juicy burgers that are not overdone on the edges and then raw in the center, so they are safer to eat as well.

You can easily make this a gluten-free dinner by using crunchy romaine lettuce leaves as lettuce wraps. You may also enjoy shaping the burgers into oblong shapes to better fit into the longer lettuce wraps, you know, like a fat hot-dog shaped hamburger patty. We don't put holes in the center of the oblong patties. they cook fast enough because they are narrow.

I start baking the oven fries about 40 minutes before he starts grilling the meat. Our daughter prepares the other hamburger toppings and sets the table.

You can make fry sauce by mixing ketchup and mayonnaise together. Go heavier on the ketchup. You can add a touch of seasoned salt to the fry sauce if you want. A bit of smoked paprika added is nice too. I think McD's adds sweet pickle relish to their "Special Sauce". 


Crispy Oven Fries:

1 potato per person (I used Yukon Golds)
Deodorized coconut oil
Seasoned salt, to taste


Method:

Preheat oven to 450 degrees.
Generously oil a baking sheet with coconut oil.
Scrub the potatoes and cut in the middle lengthwise. Then cut into strips almost 1/2-inch wide.
Arrange the cut potatoes in 1 layer on the oiled baking sheet and bake about 20 to 30 minutes.
Turn the potatoes and bake another 15 minutes, or until golden brown. 
Serve hot.


The Perfect Grilled Burger:

Organic ground beef or buffalo
Seasoned salt
Garlic seasoning, optional
Cheese, optional

Recommended Hamburger Toppings:
Mayonnaise
Mustard
Romaine lettuce
Sliced ripe tomatoes
Crisp bacon strips
Pickles
Onion slices
Avocado slices
Whatever else you can think of...


Method:

Preheat your outdoor grill.
Shape the burger into patties the size you want.
Season both sides of the patties with seasoned salt and garlic seasoning.
Poke a hole in the center of each patty.
Grill on your grill about 5 minutes, depending on the size of your burgers.
flip burgers and top with cheese if desired. 
Grill a couple minutes more and serve hot.
Top with your desired hamburger toppings.
You can choose a gluten-free option and make into a lettuce wrap.


The Yukon Golds are baking in coconut oil before the hamburgers are started. So far they have baked 30 minutes.

3 hamburger patties were made and seasoned from 1 lb organic ground beef.

Poke a hole in the center of the hamburger patties.


The grilling burgers are ready to be topped with cheese. See how the holes have closed up?

This burger is ready to get dressed.

The oven fries have been seasoned with season salt.

That's a nice looking plate of food.

This baby is wrapped in saran wrap or it will drip to my elbows!

CHOMP!


Enjoy!

Leila.


The Perfect Baked Potato - Plus a shortcut

All baked potatoes are not created equal.


There is a BIG difference in taste in the way the humble baked potato is prepared, otherwise I would not post something that is such a no-brainer. This is so simple to do.

I have been to restaurants that wrap their potatoes in tin foil before baking them. The flavor of these foil wrapped potatoes is quite inferior to the recipe I have posted here. Please do not wrap your potatoes in foil.

Potato skins get the most enjoyable flavor when baked 'naked' and allowed to brown and get crispy in the oven. You need to bake them a little longer than usual but it is SO worth the wait. I included a short cut (precooking the potatoes in the microwave) I frequently use to speed the process along.

When I was growing up, my mom would bake our potatoes this way. We would scoop out the steamy insides and load them up with our favorite toppings, saving the browned skins for last. We would put lots of butter inside the skins and season with salt and pepper to taste. Then we would pick up the skins and eat them like you would a taco, so the butter wouldn't run out all over the place. No, I wasn't fat as a child, why?


Formula for The PERFECT BAKED POTATO:

Medium sized potatoes (Russet or yukon Gold), 1 per person
Organic salted butter
Biosalt or sea salt
Fresh ground pepper
Sour cream blend
Scallions or chives,washed and minced
Grated cheese
Crisp crumbled bacon, optional


Method:

Scrub the potatoes well, so the skins may be eaten (because they're very yummy prepared this way).

To save time, microwave the potatoes about 15 to 20 minutes, until tender.

Or if you do not want to microwave the potatoes first, just bake the potatoes until the centers are tender and the skins are extra crispy, about an hour or more.

Push metal skewers through the center of the hot cooked potatoes.

Bake in a preheated 450 degree oven for about 20 to 30 minutes, or until the skins are crispy and papery to the touch. they will also start to smell toasted.

Serve the potatoes at once. If they need to sit a few minutes, place the hot potatoes on a cooling rack to keep the crisp skins from getting soft from the steam.

Split the potatoes and load on the toppings to taste.


Microwave potatoes about 20 minutes to save time, until tender.

Put metal skewers through the microwaved potatoes.

Bake the potatoes in a 450 oven until the skins are crispy and papery.

The finished crispy baked potatoes. see how the skins look papery?

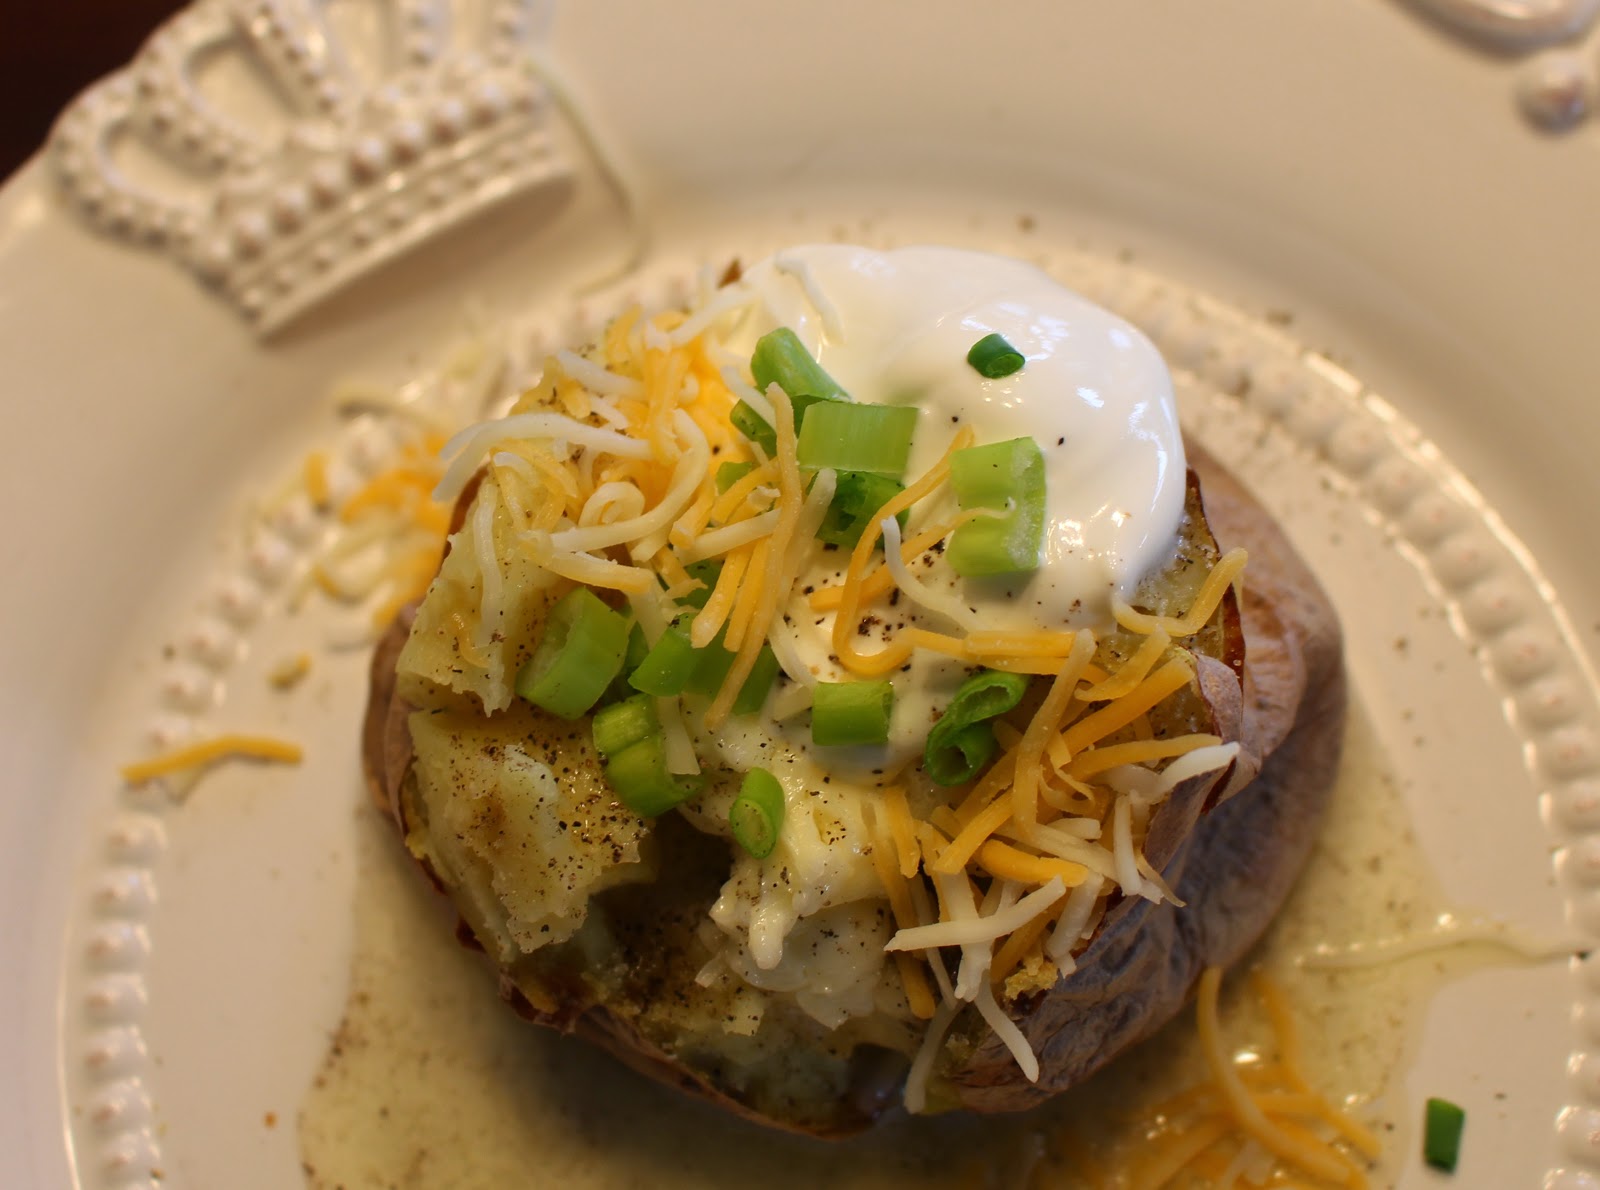
The loaded baked potato. Do you think there is enough butter?

A nice looking plate of food.


A buttery baked potato skin.


Enjoy,

Leila.

Easy Garlic Parmesan Zucchini & Tomato Bake (Low-Carb)

Here is a delicious low-carb & gluten-free side dish that is very fast to put together. 

Garlic Parmesan Zucchini & Tomato Bake

Garlic Parmesan Zucchini & Tomato Bake Recipe:

6 young zucchini, diced into bite-sized pieces (and/or yellow summer squash)
1 onion, diced
4 cloves garlic, finely minced or mashed, or more to taste
1/4 c. minced fresh basil or Italian parsley, optional
1 to 2 cans diced stewed tomatoes, regular or Italian style
2 t. Italian seasoning
1 t. BioSalt or sea salt
1/2 t. freshly ground black pepper
1/4 c. shredded Parmesan cheese
1 1/2 c. shredded cheddar/jack cheese blend, for topping


Method:

Preheat oven to 350 degrees.

Mix together all but the cheese for topping.

Place in an oiled casserole dish.

Bake 25 minutes for crisper cooked vegetables, or 35 minutes for more cooked vegetables.

When the vegetables are close to being done, top with cheese blend, and bake until bubbling and starting to brown.


Note: 

You can cook the casserole with the fresh basil or parsley mixed in , or reserve it for garnishing the top when serving.


Garlic Parmesan Zucchini & Tomato Bake ingredients.

Mix together and place in Casserole dish.

I have included yellow squash too.

When almost done baking, top with cheese and bake until browned and bubbling.

Garlic Parmesan Zucchini & Tomato Bake makes a great low-carb side.


Enjoy,

Leila

Thursday, April 2, 2015

Refreshing Iced Rooibose Tea Recipe (Caffeine-Free Sugar-Free)


Stay hydrated! This healthy iced tea is a great way to do that.


Now that the weather is starting to warm up, I wanted to share with you a delicious recipe for a very refreshing, healthful iced tea.

If you have not heard of rooibose tea before, it is a very tasty herbal tea that is very high in healthful antioxidants and is naturally caffeine-free. I love using it as a base for my Herbal Chai and Thai Tea beverages. I also love it alone, hot or cold. Look for rooibose at your local health food store, or online.

I have included different sweetening options for this iced tea. I usually cut the amount of granular sweetener called for by at least half and enhance the sweetness with Stevia Glycerite, to taste. It makes the cost of the sweetener alternatives less expensive to use, and it tastes just as good. Stevia only tastes weird or bitter if you use too much. Most people use too much. In a large mug of hot herbal tea, I only use about 4 drops of stevia, just so you get an idea of how much to use. Sour things may need more sweetener, obviously.


Caffeine-Free Rooibos Iced Tea recipe:

5 cups purified water
3 Rooibose tea bags (remove any paper tags)
4 to 5 T. Raw organic sugar, or 5 T. xylitol, or 6 T. erythritol or Lakanto zero-cal sweetener
2 lemons
1 lime


Method:

Bring 4 cups water to a boil, remove from heat and add tea bags. cover and steep several hours, or preferably overnight. The stronger the tea, the better. Store in the fridge until needed.

Dissolve the sweetener in 1 additional cup of hot water and stir until dissolved.

Juice the lemons and lime.

Remove and squeeze dry the rooibose tea bags. Add the 1 cup sweetened water and citrus juice to the rooibose tea. Mix and serve over crushed ice.


Notes: 

If you choose, reduce the above sweetener by half and add a few drops of stevia glycerite, to taste.

You may also try steeping the rooibose teabags with cinnamon chips too.


To make 2 liters:

Place 4 Rooibose tea bags inside a 2 liter jug. Pour boiling water to fill the jug and let steep 5 to 10 minutes. Add about 5 to 6 T raw organic sugar or other sweetener of choice, to taste. stir to dissolve. Remove the teabags when the tea is strong enough for your liking, or leave teabags in and chill for a few hours in the fridge. Do not dilute with ice at this time.

You may like adding chopped fruit to your glass of ice (chopped apple, a lemon slice, orange, pineapple...).


Enjoy!

Leila


Tuesday, March 31, 2015

Easy Decadent Fruit Salad (Sugar-Free, Gluten-Free & Reduced Carb)

The BEST Fruit Salad
- Great for spring, summer, or anytime you can get your hands on sweet juicy fruits!

Decadent Fruit Salad

This is our favorite fruit salad. 

This wonderful fruit salad is much lower in carbs than any other fruit salad out there, which is a bonus. I kinda don't care though because this salad is so awesomely delicious. I like that is uses NO pudding mix, NO non-dairy whipped chemical toppung, NO Jello, and NO chemical sweeteners or artificial food coloring.

It is so easy and delicious...You'll see.

We like the almond extract flavor to be pretty pronounced here. Peaches, apricots, raspberries, and cherries are also incredible in this salad. I'm not a fan of marshmallows in salad, especially this salad, but do what moves you. I'm going to try it with my newly made sugar-free marshmallows, just for kicks & giggles. Probably just a one-time thing...

For whatever reason, I have actually lost weight when including this salad in my menu. Weird, but I'm going with it :)


Decadent Whipped Cream Fruit Salad Recipe:

1 c. cold heavy whipping cream
1/8 t. cream of tartar
1 t. real vanilla extract
1/4 c. powdered xylitol, powdered Lakanto white zero-cal sweetener, raw honey, or powdered sugar
1/4 to 1/2 t. stevia glycerite, to taste (see recipe on blog)
1 1/2 to 2 t. almond extract, to taste
2 c. sweet red or green seedless grapes
3 c. diced sweet pineapple
3 c.ripe strawberries
4 sweet  tangerines
2 ripe bananas


Method:

Wash and cut up the fruit into bite-sized pieces. You want a total of about 12 cups of assorted sweet, ripe fruits, in season.

Whip the very cold whipping cream with the cream of tartar. The cream of tartar stabilizes the whipping cream. I like to freeze the beaters while I am preparing the fruit.

Add the vanilla, almond extract and  sweetener of choice.

Taste for sweetness and add stevia glycerite to kick up the sweetness a notch, to taste.

Mix the fruit into the finished whipped cream and serve immediately.


Whip heavy whipping cream with the cream of tartar for stability.

Wash and cut up fresh ripe fruit into bite-sized pieces.

Mix the fruit gently into the finished whipped cream.

Fruit salad ready for serving. Transfer to a pretty serving bowl.

Fruit salad ready to eat!

I'm thinking that some homemade sugar-free marshmallows could be good in this salad too - If you are into that sort of thing.


Enjoy,

Leila

P.S. I just tried this salad with my sugar-free marshmallows and it was pretty good...

Easy Chicken Chile Verde Soup (with 2 variations) PLUS How to Caramelize Onions Faster!

Here is another EASY pantry meal: Chicken Chile Verde Soup. Iv'e been doing a lot of sugar-free candy formulating lately (like marshmallows and caramel), so I have needed quick meals for the family, preferably ones that make great leftovers!

Creamy Chicken Chile Verde Soup

I felt like creating a new Mexican-style soup using the batch of home made chicken stock I just made. We like to buy rotisserie chickens from Costco for a quick meal. I then usually make chicken stock from what ever is left of the chicken. Having so much freshly made chicken stock on hand, I am always seeking new ways to use it because we like variety at our house.

Today I felt like Mexican, but I didn't want a black bean soup, or a tortilla soup, or even a red Mexican soup. So tomatillos came to mind, and roasted green chilies...and I was off!

The recipe posted here is what I came up with. I am pleased with the results, especially when my husband said it is now one of his top favorite soups ever. The rest of the family really enjoyed it too.

I like to stock my pantry with some Mexican staples, which makes putting this soup together very quick and easy.

This soup has a lot going on. It is loaded with goodies. It has a nice tang and brightness from the tomatillos and lime, and is accented with a touch of sweetness to balance out the flavor of the roasted peppers. It also has an appealing smoky depth from the chipotle and smoked paprika. And we always love what caramelized onions bring to the party, right?

Here is a tip about caramelizing onions more quickly and creating a more flavorful result: 
Add a pinch of baking soda, and for the best flavor a pinch of salt while you are sauteing the onions. They will brown faster and have superior flavor this way. The baking soda changes the pH in a way that affects something called the Maillard Reaction (the browning process). Now you know.

I created 2 soup varieties.: A dairy-free version and an extra creamy version. I served the extra creamy version.


Leila's Easy Chicken Chile Verde Soup (2 ways):

1-2 T. coconut oil and/or butter
A pinch of baking soda
4 large garlic cloves
1/2 t. smoked paprika
1/2 t. cumin
1/4 t. Mexican oregano
25 grinds black pepper, to taste
A pinch ground chipotle pepper, to taste
1/4 t. granulated garlic (or garlic powder)
1 4.25-ounce can chopped pitted black olives
1 7-ounce can Fire Roasted Diced Green Chilies  (La Victoria brand has the best roasted flavor)
1 15-ounce can crushed tomatillos (like Hatch brand)
1 15-ounce can Great Northern beans (white beans), undrained
1 28-ounce can green chile enchilada sauce (like El Paso brand)
1 29-ounce can Mexican Style Hominy (like Juanita's brand), drained
1 quart home made chicken stock, or organic boxed chicken stock
1/4 c. good quality white wine, optional
2 t. BioSalt or sea salt
1/2 t. onion salt
Shredded chicken meat (about a pound), to taste
1 lime, juiced
3 T. Brown Just Like Sugar and/or raw honey (I used 2 T just Like Sugar and 1 T. honey) *

1 block (8-ounces) Neufchatel or cream cheese, optional for the creamy version of this soup


Garnishes:

Minced cilantro
Avocado slices
Mexican cheese
Diced ripe tomatoes
Sour cream
Smoked paprika


Method:

Saute the onion in the oil, adding a pinch of baking soda and a pinch of BioSalt to caramelize the onions faster.

Smash the garlic with some of the salt called for and add to the almost finished onions. Saute.

Add the smoked paprika, cumin, Mexican oregano, garlic powder, fresh ground black pepper, and chipotle powder. Saute until fragrant to bloom the flavors of the spices.

Add all of the canned goods and chicken stock and let the soup simmer about 30 minutes or so. The soup will thicken slightly.

Add the cooked and shredded chicken meat.

To make the creamy version of this soup: Cut up the block of Neufchatel or cream cheese into cubes and stir into the soup, and let simmer a few minutes to let the cheese melt, stirring to speed the melting process. Turn down the heat so that the soup doesn't stick to the bottom of the pan.

Add the rest of the BioSalt called for and the juice of 1 lime.

Add the Just Like Sugar and/or raw honey. If using honey, add just before serving so that you don't boil the honey. Taste the soup and adjust seasonings if needed.

Serve hot with garnishes of choice.


Note: You may also use Lakanto's golden zero-calorie granular sweetener instead of Just Like Sugar.


Tip: I think a lovely appetizer would be my Chili"s Copy Cat Salsa recipe and corn chips!


Get your ingredients ready.

Caramelizing the onions.

Adding the canned ingredients to the soup.

The finished Dairy-Free Chicken Chile Verde Soup (not the creamy version).

The Dairy-Free Soup Version garnished and ready to eat.

The Creamy Chicken Chile Verde Soup is finished (with the cheese added).

The Creamy chicken Chile Verde Soup is served.

How I like to smash my garlic, releasing the maximum amount of flavor oils.

Brown Just Like Sugar (a healthy sugar-free brown sugar replacement).


Enjoy,

Leila.


P.S.   In case you were curious about how my sugar-free candy testing is coming out...

Sugar-Free Hand Wrapped Vanilla Caramels.

Fluffy Sugar-Free Vanilla Marshmallows.

Author, Leila.