Sunday, April 26, 2015

Super Easy Potatoes, Eggs & Ham Skillet Meal (Gluten-Free & Dairy-Free options)


Perfect for a Sunday afternoon, when you want to serve something delicious and filling to your family, without wearing yourself out in the kitchen. 

Super Easy Potatoes, Eggs & Ham Skillet Meal

Today was one of those Sundays... I felt like I needed a nap almost all day. I like making Sunday a day of rest. Our lives are so hectic, it's nice to reserve at least one day a week where you can connect with people you love, get some relaxing in, and even have some alone (NAP) time.

Wrapped burrito-style.
This yummy skillet meal makes a mean breakfast burrito for on-the-go, or just eat it as-is on one of those plate thingies, you know, those things you use to hold food, like when you sit at a table, together, as a family?

I quickly made this meal today and figured out a new great way to steam and soften the tortillas. Microwaving tortillas makes them tough and they dry out quickly, and I do not recommend it. Using tortillas strait out of the package, cold, is yucky too in my opinion - Plus they crack and break spilling the filling all over the place. FOOD FIGHT!

Not.

I used a couple of left over Perfect Baked Potatoes (recipe on blog) for this quick to prepare meal.

It is easy to make this a gluten-free or dairy-free meal by how you select your ingredients.


Potatoes, Eggs & Ham Breakfast Skillet Recipe:

Serves 6 generously

1 T. deodorized coconut oil
1 T. organic butter
2 cold leftover baked potatoes, cubed
1/2 large red onion, diced
2 c. ham, diced
1 red bell pepper, diced
4 large free range eggs
1/4 c. organic milk or purified water
20 grinds fresh black pepper
1/8 t. garlic powder
2 c. shredded cheese blend of choice, optional
1/4 t. smokey paprika, optional
1/2 t. BioSalt or sea salt, to taste
2 scallions, minced
1 tomato,diced
1/4 t. onion salt
Large flour tortillas, steamed, optional (for making breakfast or brunch burritos)
Sour cream, optional (We love to use our Favorite Reduced Fat Sour Cream Blend)
Salsa, optional


Method:

Melt the coconut oil and butter in a large skillet over medium-high heat.

Add cubed potato and saute 1 minute.

Add the onion and saute 1 minute.

Add the ham and saute a few minutes, until starting to brown.

Whisk the eggs with 1/4 c. milk or water and set aside.

Meanwhile, in a separate skillet with a lid, place a small metal cooling rack inside. Fill skillet with about 1/2-inch of water. Place the skillet with lid on, over medium heat and let the water start to steam.

Add the red bell pepper to the ham mixture and saute until everything is starting to brown nicely.

Place the desired number of flour tortillas onto the metal rack above the simmering water. Place lid on and steam tortillas a couple minutes, until warm and soft. Remove from heat and keep lid on.

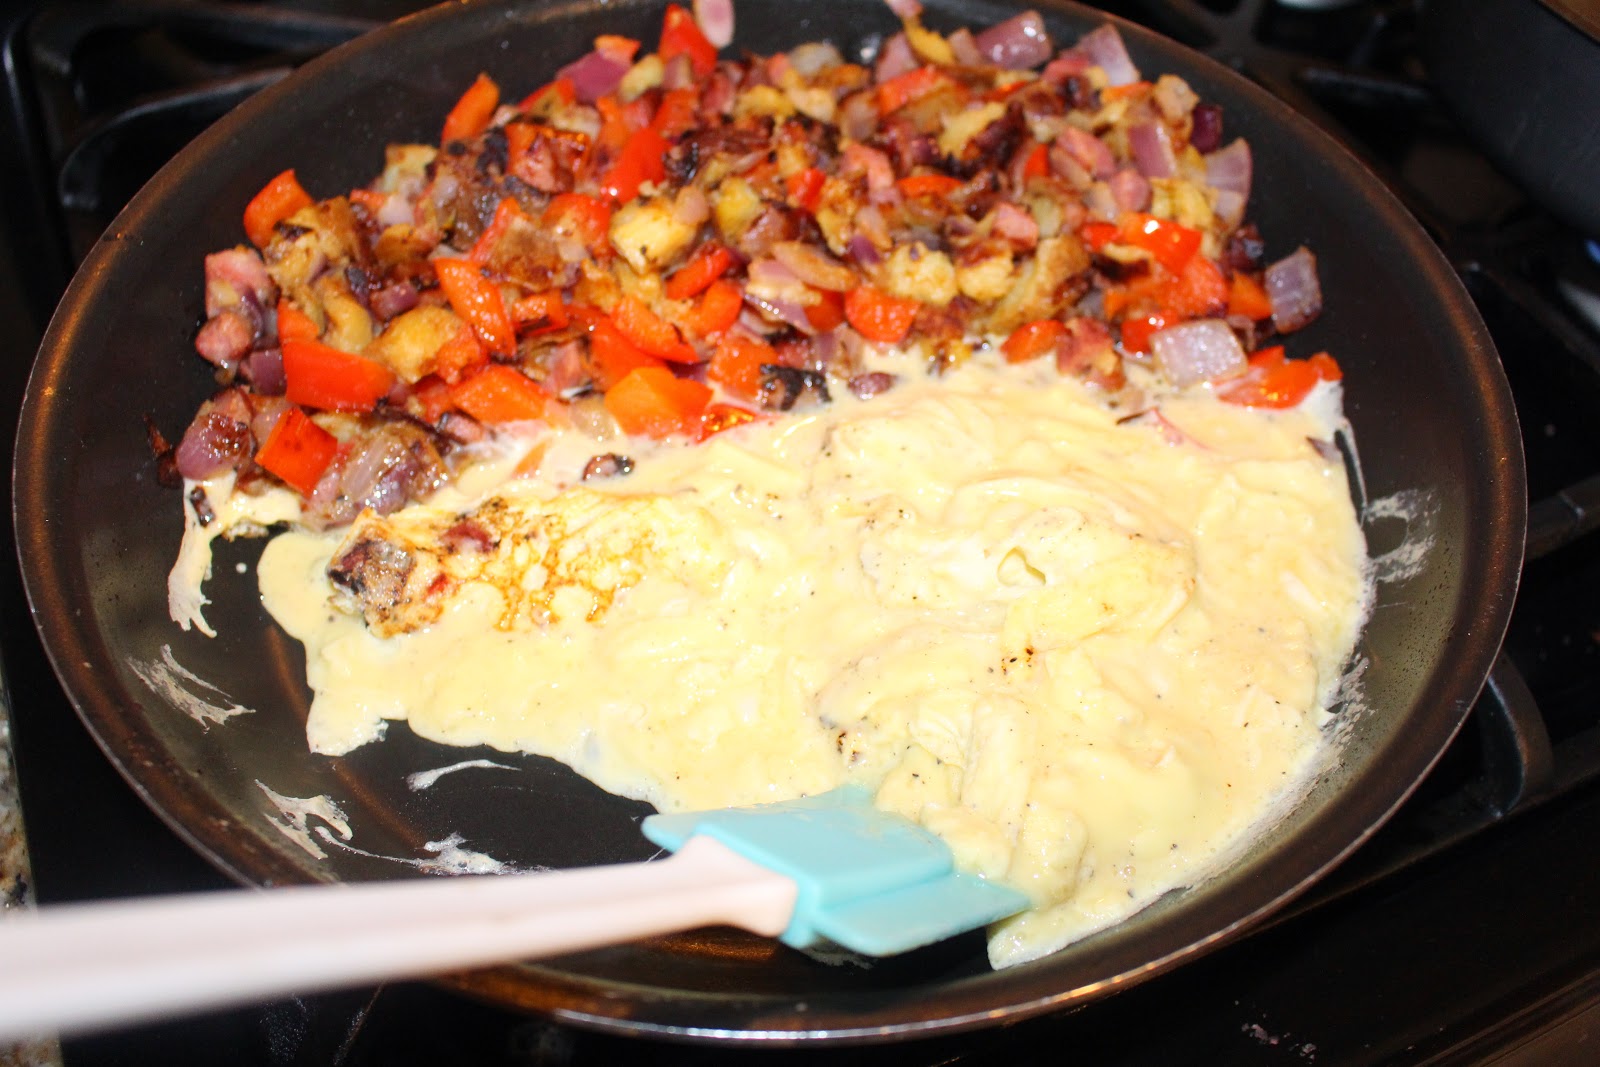
Push the ham mixture to one side of the skillet and pour the egg mixture into the empty side.

Scramble the eggs until just barely cooked through (you can add a dab of butter if desired).

Mix the eggs into the ham mixture. Season with salt and mix. Top with cheese and let it melt.

Sprinkle with smoked paprika if desired. Top with tomatoes and scallions. Sprinkle with onion salt.

Serve hot along with sour cream and salsa as garnishes.

Make into fabulous breakfast or brunch burritos using the steamed flour tortillas.


Photos of the process:

Prep your ingredients.

Add potatoes to the melting coconut oil and butter.

Add the onions and saute.

Add the ham and saute.

whisk egg mixture.

Brown the mixture.

Prepare a pan for steaming the tortillas.

Place tortillas onto rack over steaming water.

Steam as many tortillas as needed.

Place lid over tortillas to steam gently.

The skillet mixture is sizzling and browned.

Push ham mixture aside and pour egg mixture into the pan,

You can now add additional butter to the eggs. 

Gently scramble the eggs.

Mix the just cooked through eggs into the ham mixture.

The skillet is ready for toppings.

The tortillas are steamed and flexible.

Top with shredded cheese blend.

Let the cheese melt.

Season with salt and stir the cheese in a little.

Top with fresh tomatoes.

Top with scallions.

Sprinkle with onion salt and smoked paprika to taste.

The skillet meal is ready to eat!

Laying out the goods onto a soft warm tortilla.

Fold 1.

Fold 2.

Fold 3.

E-A-T


ENJOY,

Leila.


Friday, April 24, 2015

Light & Fluffy Vanilla Microwave Jiffy Cake - Amazingly Sugar-Free & Gluten-Free

This is a special recipe. 
If you have been looking for a healthy 2-minute microwave cake or muffin recipe, this is it. 

Not only is this cake amazingly light textured, it is also gluten-free, sugar-free, low-carb, high fiber, dairy-free, starch-free, and chemical-free.

Basic Vanilla Jiffy Cake with Sugar-Free Chocolate Ganache Topping.

Vanilla Jiffy Cake
There are some recipes out there that use almond flour and/or coconut flour, but they are generally heavy, dry, and not convincing. It is highly unusual to have a tasty sugar-free, gluten-free, and low-carbohydrate recipe in one.

You're welcome :)

I purposely pared this cake/muffin recipe down. It is like a blank canvas, ready for you to unleash your creativity on.

I'm thinking, pumpkin-spice, applesauce cake, lemon-blueberry, sugar-free chocolate chip frosted with sugar-free chocolate ganache... I will be posting a almond-poppy seed muffin recipe next, using this recipe as the foundation. Check back soon.

This recipe is also a work in progress. Don't get me wrong, it's great as it is, but our recipes continually evolve here at Kitchen Cheetahs. We already have many variations, but I wanted to provide you with a basic recipe that is easy to make at home, with ingredients easy to source.


For a grain-free version, you may omit the oat bran flour and chia flour and use 1 T. golden flax seed meal instead. Note that the taste of the flax meal will be noticed in this recipe, since there are no spices or other strong flavors to mask the taste.

We like to make multiple batches of the single-serving dry cake/muffin mix and individually seal them in small zip-lock bags. When the munchies hit, grab 1 bag of dry mix and add the wet ingredients, mix, microwave, and enjoy!

This Jiffy Cake generously serves one. My daughter and I usually share one. An added benefit of this cake is that it is quite filling, and staves off cravings for hours. This cake isn't full of empty calories either, so it makes a great meal or snack. We like these low-carb Jiffy Cakes a lot, as they help with carb cravings when you want to slim down.


Basic Jiffy Cake Recipe for One Jiffy Cake:

Dry Ingredients:
3 T. (24 grams) white almond flour (Honeyville is a good brand)
2 T. (18 grams) coconut flour (we like Wilderness Family Naturals brand)
2 t. (6 grams) oat bran flour
1 t. (2.50 grams) chia seed flour
1 T. (15 grams) erythritol (or Lakanto's granular zero-cal sweetener)
1 T. (14 grams) xylitol
1 T.  (11 grams) IMO powder (or inulin powder)
1/2 t. (2.50 grams) baking powder
1/8 t. (0.40 grams) lecithin powder
heaping 1/16 t. (0.50 grams) sea salt

Wet Ingredients:
1 large egg, at room temperature (about 50 -51 grams)
1 t. (8 grams) vegetable glycerine
1/8 t. (1 gram) stevia glycerite, to taste
2 T. (28 grams) warm water
2 T. (26.50 grams) warmed deodorized coconut oil
1/2 t. (2.50 grams) real vanilla extract


Method:

Pre-grind your chia seeds into a fine flour using a small seed/coffee mill.
Grind together all the dry ingredients so that the sweeteners are powdered into the mix.
Store dry mix in an air-tight container until ready to use.

To make one Jiffy Cake:

In a 2-cup microwave safe baking container, whisk the egg until blended.

Add the other wet ingredients in the order listed and mix to combine.

Place the container of batter off-center in your carousel microwave and cook on high for 2 minutes, uncovered. The center should just spring back when touched.

Let cake cool in the microwave 3 minutes.

Remove from microwave and invert cake onto a plate, if desired, and cool 3 more minutes.

If you are not going to eat the cake right away, cover the cake to prevent it's drying out.


Photos of the process:


Get all your ingredients out.

A seed mill and good scales are helpful to have.

A small casserole dish (with vented lid) for cooking the cake in.

Measuring the dry ingredients.
I move each ingredient to the opposite side as I use it, so I don't forget where I'm at in the recipe.

The coconut flour I used.

Grind the dry ingredients together in 2 batches.

Do not grind until mixture heats up or it will clump.

The finished dry cake/muffin mix.

Crack the egg into the baking dish then mix in the rest of the wet ingredients.

Mix the dry mix into the wet mix until lump free.

Place the baking container off-center in the microwave so it will cook more evenly.

Let the cooked Jiffy Cake cool in the microwave for about 3 minutes.
Remove cake from microwave and let cool another 3 minutes.

The finished vanilla Jiffy Cake.
Cover the cake if you are not going to eat it right away

The cooled cake is ready to frost.

Here is a sugar-free chocolate ganache frosting.

Dig in!

Look at the light texture and moist crumb...

Hard to believe that this is a guilt-free treat, huh?

O.K., I'm going to go eat this now.


Enjoy,

Leila & Nancy.

Wednesday, April 22, 2015

Copy-Cat TRUVIA Sugar Replacement Recipe

Copy-Cat Truvia Recipe (Sugar-Free Sweetener Substitute)

At way less than half of the cost of Truvia, it is well worth making your own! This is sweeter cup-for-cup than regular sugar, as this recipe is meant to mimic Truvia's sweetening profile.

Erythritol does not dissolve as easily as regular sugar, so you may need to help it along by heating it with the liquid you are putting it in and then stirring until completely dissolved. This blend is great for sweetening hot herbal teas for example.

Erythritol is extremely low in carbs and has a glycemic rating of almost zero, so it is great for low-carb diets. Nice.


Copy-Cat Truvia Recipe:

Yield: 1/2 cup (recipe easily multiplies)

1/2 c. granular erythritol *
1/4 t. pure white stevia extract powder **

Method:

Mix by shaking together very well in a sealed glass jar and store air-tight.


Tip: 

You can powder the erythritol with the stevia in a seed mill to get a finer textured sweetener. Just do not over-mix or the erythritol will start  to heat up, sticking to the seed mill's blades. A way to combat this sticking issue and still get a "powdered sugar", is to add about 10% tapioca starch before you grind it.

* You may also use Lakanto's White granular sweetener, which is erythritol enhanced with monk fruit.

** Like Carbohydrate-free NuStevia NoCarbs Blend (substitutes erythritol for the usual corn-based maltodextrin)


Have fun,

Leila