Showing posts with label Side Dish. Show all posts

Saturday, April 11, 2015

Creamy Parmesan Cauliflower Broccoli Bake

True comfort food: Parmesan Cauliflower Broccoli Bake


This is one of my most favorite casseroles ever. Parmesan Cauliflower Broccoli Bake is a creamy, delicious vegetarian casserole. It makes a great side for just about any meal. It tastes super with or without the added tarragon, marjoram, rosemary, and thyme. You could also use Herbs de Provence or Fine Herbs as well. 

I made my own bread crumbs. It is healthier, super easy to do, and you can make it fresh for pennies. I made this delicious casserole for our Easter dinner this year and served it along side perfectly baked salmon (thanks to my cute husband) and roasted asparagus. It was a terrific meal. 
I have not done it yet, but I know this casserole would taste amazing with some crispy fried onions sprinkled on top along with the bread crumb topping. I am going to do this next time I make this casserole.

I hope you enjoy this comforting casserole as much as we do.


Parmesan Cauliflower Broccoli Bake Recipe:

1/2 c. Herb & Garlic bread crumbs (like Progresso brand), or home made *
2 T. melted butter
1 lb fresh cauliflower florets and stems
1 lb fresh broccoli florets and stems
1/4 c. plus 2 T. grated Parmesan cheese, divided
2 T. all-purpose flour
1 T. butter (can omit and just use a non-stick spray for the pan, but butter is better!)
1 large onion, diced
A pinch of baking soda
1 1/4 c. organic milk
4 ounces neufchatel or cream cheese, softened
1/2 t. garlic powder
1 t. seasoned salt
1/2 t. onion salt
1/2 t. BioSalt, to taste
Fresh ground black pepper, to taste
A pinch each of tarragon, marjoram, rosemary, and thyme, optional


Method:

Wash and trim the cauliflower and broccoli. Peel the tough outer skin off the broccoli stem. dice the broccoli and cauliflower stems into small bite sized pieces. If using frozen cauliflower and broccoli, thaw them completely first. Cut the florets into bite sized pieces.

Preheat oven to 350 degrees. Butter a deep 2-quart baking dish and set aside.

In a small bowl, mix the dry breadcrumbs, 2 T. melted butter, and 2 T. Parmesan. Set aside.

In a large pan saute diced onion until tender in 1 T. butter and a pinch of baking soda, to aid caramelization. (You may just use a non-stick spray instead, but it isn't as tasty.)

Sprinkle flour over cooking onions and stir in well. Saute another minute.

Pour milk over cooking onions and stir in well, until it starts to thicken.

Add the neufchatel or cream cheese and the 1/4 c. Parmesan cheese and stir until the cheeses melt.

Add the garlic powder, seasoned salt, onion salt, and fresh ground pepper. Stir in well and taste.

Add up to 1/2 t. BioSalt, to taste.

Add herbs, to taste, optional.

Add the vegetables and toss well to coat. Scrape into the prepared casserole dish.

Sprinkle the top with the bread crumb mixture.

Bake 45 minutes, or until the top is lightly browned and vegetables are tender.


* To Make the Topping using Quick Home Made Bread Crumbs:

1 heel of a loaf of whole grain bread, crumbled fine
1/4 t. Garlic powder
A pinch each of tarragon, marjoram, rosemary, and thyme
The 2 T. butter called for above


Method:

In a small non-stick frying pan placed over medium heat, transfer the fine bread crumbs. Stir the crumbs around if they are not dried out yet, and gently toast them.

Put the garlic and herbs in the pan and stir a bit until they are fragrant.

Add the 2 T. butter called for and saute until the crumbs are well coated and remove from heat.

Let cool a bit before adding the 2 T. Parmesan cheese. Proceed with the recipe above.


Fresh out of the oven.

A perfect dinner.


Enjoy,

Leila.

Friday, April 10, 2015

Garlic Roasted Asparagus

An easy way to prepare fresh spring asparagus


I usually steam my asparagus but I wanted to try roasting it instead, just for something different. I think this is a nice option for when you are already using your oven. I use deodorized coconut oil so the coconut flavor doesn't interfere with the delicate taste of the asparagus. I also prefer using fresh garlic over dried garlic, but either works.

How will I cook my asparagus next time?

I will probably steam it.

Why?

Because I prefer the way it tastes.

When I steam asparagus, I put it in a serving dish when it is still tender-crisp and bright green. I then slather it in real butter, and season with fresh ground black pepper and onion salt to taste.

I noticed the asparagus was seriously lacking in buttery goodness when it was baked.

So, here is what I will do the next time I choose to roast asparagus: Use less coconut oil to roast the asparagus. Still infuse the coconut oil with the garlic. Roast in the same manner. Put hot asparagus in a serving dish and top with butter, season with fresh ground black pepper and onion salt to taste. Roll the asparagus spears around in the butter and seasonings to coat well and serve.

If you are vegan, stick with the coconut oil version, it still tastes great. I'm just a butter freak.

Garlic Roasted Asparagus

2 lb Asparagus
1 T. Deodorized coconut oil
1/2 t. Garlic powder or 1 to 2 cloves very finely minced fresh garlic
1/4 t. Onion salt, to taste
1/4 t. Fresh ground black pepper, to taste


Method:

Wash and trim the fresh asparagus (trim by snapping off the tough woody ends).

Lay the asparagus onto a rimmed baking sheet.

Gently warm the coconut oil and mix in the garlic powder or minced garlic.

Pour over the asparagus on the baking sheet.

Sprinkle onion salt and freshly ground black pepper, to taste. Toss to coat well.

Roast asparagus in a 350 degree oven for 15 minutes. Transfer to a serving dish and serve hot.


Tip: If using garlic powder, you may alternately choose to generously oil the baking sheet with the coconut oil and sprinkle the desired seasonings over top and roast.

The seasoned asparagus in the roasting pan.

Transfer roasted asparagus to a serving dish.

Serve hot.


Enjoy,

Leila.

Saturday, April 4, 2015

The Perfect Baked Potato - Plus a shortcut

All baked potatoes are not created equal.


There is a BIG difference in taste in the way the humble baked potato is prepared, otherwise I would not post something that is such a no-brainer. This is so simple to do.

I have been to restaurants that wrap their potatoes in tin foil before baking them. The flavor of these foil wrapped potatoes is quite inferior to the recipe I have posted here. Please do not wrap your potatoes in foil.

Potato skins get the most enjoyable flavor when baked 'naked' and allowed to brown and get crispy in the oven. You need to bake them a little longer than usual but it is SO worth the wait. I included a short cut (precooking the potatoes in the microwave) I frequently use to speed the process along.

When I was growing up, my mom would bake our potatoes this way. We would scoop out the steamy insides and load them up with our favorite toppings, saving the browned skins for last. We would put lots of butter inside the skins and season with salt and pepper to taste. Then we would pick up the skins and eat them like you would a taco, so the butter wouldn't run out all over the place. No, I wasn't fat as a child, why?


Formula for The PERFECT BAKED POTATO:

Medium sized potatoes (Russet or yukon Gold), 1 per person
Organic salted butter
Biosalt or sea salt
Fresh ground pepper
Sour cream blend
Scallions or chives,washed and minced
Grated cheese
Crisp crumbled bacon, optional


Method:

Scrub the potatoes well, so the skins may be eaten (because they're very yummy prepared this way).

To save time, microwave the potatoes about 15 to 20 minutes, until tender.

Or if you do not want to microwave the potatoes first, just bake the potatoes until the centers are tender and the skins are extra crispy, about an hour or more.

Push metal skewers through the center of the hot cooked potatoes.

Bake in a preheated 450 degree oven for about 20 to 30 minutes, or until the skins are crispy and papery to the touch. they will also start to smell toasted.

Serve the potatoes at once. If they need to sit a few minutes, place the hot potatoes on a cooling rack to keep the crisp skins from getting soft from the steam.

Split the potatoes and load on the toppings to taste.


Microwave potatoes about 20 minutes to save time, until tender.

Put metal skewers through the microwaved potatoes.

Bake the potatoes in a 450 oven until the skins are crispy and papery.

The finished crispy baked potatoes. see how the skins look papery?

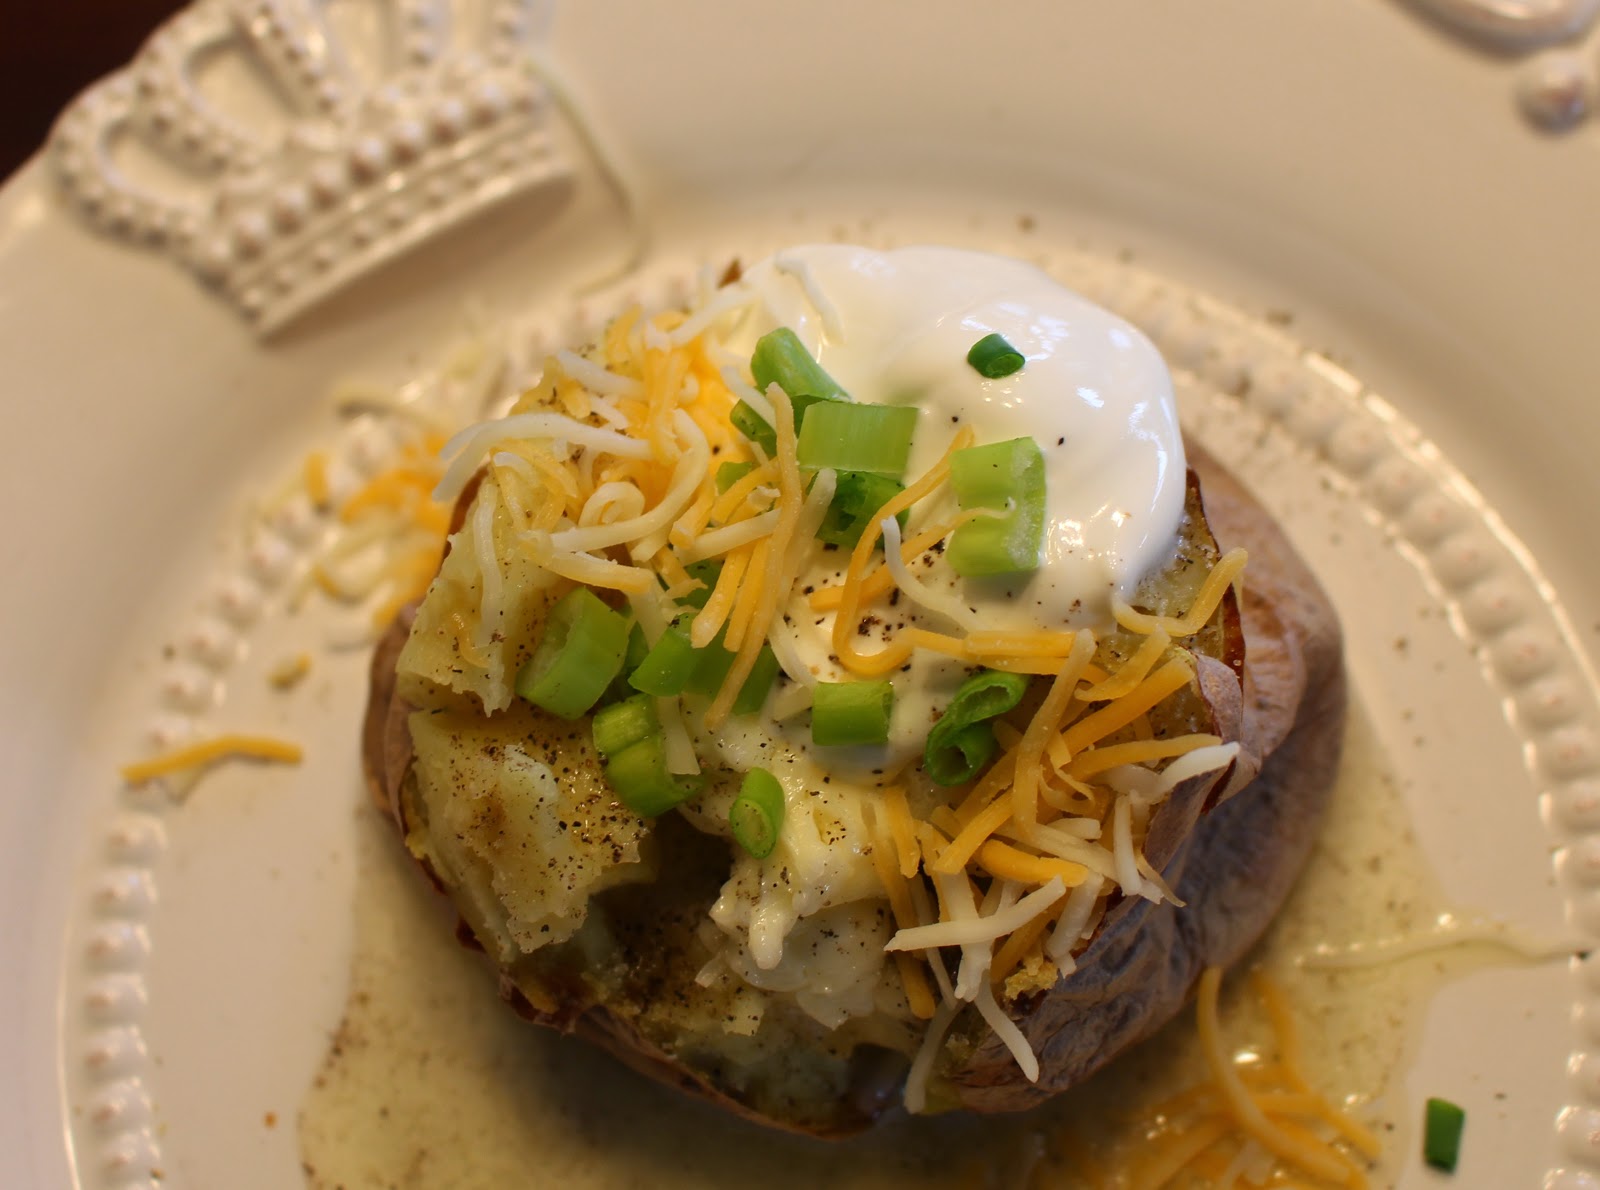
The loaded baked potato. Do you think there is enough butter?

A nice looking plate of food.


A buttery baked potato skin.


Enjoy,

Leila.

Easy Garlic Parmesan Zucchini & Tomato Bake (Low-Carb)

Here is a delicious low-carb & gluten-free side dish that is very fast to put together. 

Garlic Parmesan Zucchini & Tomato Bake

Garlic Parmesan Zucchini & Tomato Bake Recipe:

6 young zucchini, diced into bite-sized pieces (and/or yellow summer squash)
1 onion, diced
4 cloves garlic, finely minced or mashed, or more to taste
1/4 c. minced fresh basil or Italian parsley, optional
1 to 2 cans diced stewed tomatoes, regular or Italian style
2 t. Italian seasoning
1 t. BioSalt or sea salt
1/2 t. freshly ground black pepper
1/4 c. shredded Parmesan cheese
1 1/2 c. shredded cheddar/jack cheese blend, for topping


Method:

Preheat oven to 350 degrees.

Mix together all but the cheese for topping.

Place in an oiled casserole dish.

Bake 25 minutes for crisper cooked vegetables, or 35 minutes for more cooked vegetables.

When the vegetables are close to being done, top with cheese blend, and bake until bubbling and starting to brown.


Note: 

You can cook the casserole with the fresh basil or parsley mixed in , or reserve it for garnishing the top when serving.


Garlic Parmesan Zucchini & Tomato Bake ingredients.

Mix together and place in Casserole dish.

I have included yellow squash too.

When almost done baking, top with cheese and bake until browned and bubbling.

Garlic Parmesan Zucchini & Tomato Bake makes a great low-carb side.


Enjoy,

Leila

Tuesday, March 31, 2015

Easy Decadent Fruit Salad (Sugar-Free, Gluten-Free & Reduced Carb)

The BEST Fruit Salad
- Great for spring, summer, or anytime you can get your hands on sweet juicy fruits!

Decadent Fruit Salad

This is our favorite fruit salad. 

This wonderful fruit salad is much lower in carbs than any other fruit salad out there, which is a bonus. I kinda don't care though because this salad is so awesomely delicious. I like that is uses NO pudding mix, NO non-dairy whipped chemical toppung, NO Jello, and NO chemical sweeteners or artificial food coloring.

It is so easy and delicious...You'll see.

We like the almond extract flavor to be pretty pronounced here. Peaches, apricots, raspberries, and cherries are also incredible in this salad. I'm not a fan of marshmallows in salad, especially this salad, but do what moves you. I'm going to try it with my newly made sugar-free marshmallows, just for kicks & giggles. Probably just a one-time thing...

For whatever reason, I have actually lost weight when including this salad in my menu. Weird, but I'm going with it :)


Decadent Whipped Cream Fruit Salad Recipe:

1 c. cold heavy whipping cream
1/8 t. cream of tartar
1 t. real vanilla extract
1/4 c. powdered xylitol, powdered Lakanto white zero-cal sweetener, raw honey, or powdered sugar
1/4 to 1/2 t. stevia glycerite, to taste (see recipe on blog)
1 1/2 to 2 t. almond extract, to taste
2 c. sweet red or green seedless grapes
3 c. diced sweet pineapple
3 c.ripe strawberries
4 sweet  tangerines
2 ripe bananas


Method:

Wash and cut up the fruit into bite-sized pieces. You want a total of about 12 cups of assorted sweet, ripe fruits, in season.

Whip the very cold whipping cream with the cream of tartar. The cream of tartar stabilizes the whipping cream. I like to freeze the beaters while I am preparing the fruit.

Add the vanilla, almond extract and  sweetener of choice.

Taste for sweetness and add stevia glycerite to kick up the sweetness a notch, to taste.

Mix the fruit into the finished whipped cream and serve immediately.


Whip heavy whipping cream with the cream of tartar for stability.

Wash and cut up fresh ripe fruit into bite-sized pieces.

Mix the fruit gently into the finished whipped cream.

Fruit salad ready for serving. Transfer to a pretty serving bowl.

Fruit salad ready to eat!

I'm thinking that some homemade sugar-free marshmallows could be good in this salad too - If you are into that sort of thing.


Enjoy,

Leila

P.S. I just tried this salad with my sugar-free marshmallows and it was pretty good...

Monday, March 30, 2015

The BEST Waldorf Salad (Sugar-Free, Gluten-Free)

Delicious Waldorf Salad - 
Perfect for a light lunch or as a sassy side to almost any meal.


Waldorf  Salad

This recipe is more than just the boring mayo stirred into diced celery and apples. This salad has a well balanced dressing that is a bit tangy, a bit sweet and a bit savory. It's perfect. it has been a classic in our homes for a long as I can remember. there is room for some unusual add-ins, like avocado, which tastes amazing. I like to add a touch more seasoned salt to the dressing if I'm using avocado.

When I was pregnant with my 3rd child, this salad got me through the long period of morning sickness. I'm glad it wasn't ice cream or chips that I craved! this salad has a nice balance of  healthful ingredients that my body must of needed then. Anyway, I still love this salad and I think you will too.


Perfect Waldorf Salad Recipe:

2 large red crisp apples, diced (about 2 cups)
4 large celery ribs, diced (about 2 cups)
1/2 to 1 cup crispy pecans or walnuts, roughly chopped
1/2 to 1 cup organic raisins or sweetened dried cranberries
2 large ripe avocados, diced, optional

Dressing:

1 cup mayonnaise (you can mix 50/50 regular and diet mayo)
1/2 c. sour cream (try Kitchen Cheetah's Sour Cream Blend on this blog)
2 t. fresh squeezed lemon juice
1 to 1 1/2 t. seasoned salt, to taste
2 T. raw honey, xylitol, Lakanto zero-cal sweetener, or raw sugar to taste
A pinch of cayenne powder, optional for a bit of heat


Method:

Mix up the dressing ingredients to taste in a medium sized serving bowl.

Wash and dice the produce, add to the dressing and mix well.

Add the avocado if using. Gently mix and check for seasoning and adjust as desired.

I like to sprinkle the nuts and dried fruit on top at serving time.

Make seasoned salt available at the table for sprinkling on top of the salad as well.

Serve immediately.


Notes:

You can make the dressing in advance and store in the fridge until needed. I will even make a bigger batch of dressing to use in multiple salads.

This salad is best eaten immediately once made.


Enjoy!

Leila & Nancy.


Friday, March 20, 2015

An improved way to make Fried Rice (Gluten Free)

Got Rice? Use your leftover cold rice in this easy to prepare dish. That's what I did tonight.


This is a super quick and easy one skillet meal (unless you want to get all ambitious and make walnut Shrimp or something). Hmmm, that sounds good. I should make that too and post it.

My mom taught me this method of making fried rice. The secret is to toss the hot sizzling rice with the beaten egg so that the egg coats the rice as it cooks. This is so much better than those rubbery chunks of eggs that are usually in fried rice! This version is good and fast, and is really a new kid on the block compared to the ragged run-of-the-mill fried rice that's out there.

My mom also dislikes the generic frozen peas & carrot blend that is thrown into fried rice. "Why do people do that?", she asked me. She's right, it isn't very good that way. Water chestnuts are way more awesome! I did add peas this time though, sorry mom., it's what I had on hand.

O.K., my mom just texted me and let me know baby peas are cool (her words were "Mom approved"), especially with water chestnuts and BACON. Oh, how could I forget to tell you about adding bacon?! I'm fired for sure. Save yourselves from "tough ol peas and rubbery carrot cubes", and try this new version of fried rice.


Easy fried Rice Recipe:

3 T. coconut oil (can include a little bacon fat)
1 t. toasted sesame oil
6 cloves garlic, smashed (or more, to taste)
1/2 c. diced onion
1/2 large sweet red bell pepper, seeded and diced
1 c. Frozen baby peas, or 2 c. fresh sugar snap pea pods
1/2 c. frozen sweet corn, optional
1 can sliced water chestnuts
3 extra large eggs
2 T. water
Bragg's Aminos, to taste
about 4-5 c. cold leftover cooked rice
1/4 t. onion salt
fresh ground black pepper, to taste
3 scallions, diced

Variation: Add a generous amount of crumbled fried bacon!


Method:

In a wok or large skillet, place 1 T. of the coconut oil. Place pan over medium-high heat.

Add half of the smashed garlic and stir-fry 30 seconds.

Now add the minced onion and red bell pepper. Stir-fry 2-3 minutes.

Add all of the other vegetables and stir-fry a few minutes, until hot and sizzling.

While the vegetables are cooking, quickly crack the eggs into a 2-cup measuring cup.

Go stir your veggies! Now add 2 T. water and about 2 t. Bragg's Aminos to the eggs and mix well.

Pour the stir-fried vegetables into a bowl and set aside.

Add the last 2 T. coconut oil to the hot skillet and add the rest of the smashed garlic.

Give the garlic a quick stir and then add the cold rice and toss well. Stir-fry until sizzling hot.

Mound the rice in the center of the pan and pour part of the beaten egg mixture over top.

Quickly toss the rice to coat with egg well. Add more of the egg mixture and quickly toss again.

Repeat this process until all the egg has been added, tossing the rice well to coat thoroughly.

Let the egg cook onto the rice while stir-frying.

Add the toasted sesame oil and onion salt and toss well.

When it is cooked through, add the vegetables back into the pan and toss well.

Add fresh ground black pepper and more Bragg's Aminos to taste.

Garnish with the chopped scallions and serve.


How easy was that?


Tips: 

Use any vegetables you want in this dish. I often just use what I have on hand.

We use Bragg's Aminos because it doesn't make the rice dark like soy sauce does.

Make sure you use cold rice for best effect.


First saute the vegetables.

Add the water chestnuts - YUM.

Add more coconut oil and garlic to the pan.

Add the cold cooked rice.

Toss rice with 2 spatulas.

Adding the beaten egg to the sizzling rice and tossing quickly to coat.

See the nice fluffy egg-coated rice?

Add the cooked vegetables back in - Watch out for falling peas.

Season to taste, stir-fry to mix, then serve hot.


Enjoy,

Leila & Nancy

Tuesday, March 10, 2015

How to make canned re-fried beans taste GOOD!

Super Speedy Re-fried Beans


Refried beans from a can are yucky. Admit it, you only use them because you don't have time to make a good batch by scratch. I find that most Mexican restaurants refried beans aren't the greatest either. It's a shame because they can be SO good.

My favorite refried beans are served at La Casita Mexican restaurant in Springville, Utah. They most certainly have copious amounts of lard in them. They are so creamy and yummy... Well, since they won't deliver to my house at the drop of a hat, I have to make my own, often at the drop of a hat. If I would actually plan ahead, I'd make my favorite made-from-scratch refried bean recipe  It's my copycat version of La Casita's refried beans. I need to remember to post that recipe too.

Anyway, I created this easy recipe and it has been the best solution for a quick compromise, that our family really enjoys. A trick is to thin the beans with water, so they don't have such a gacky texture. Then I re-fry the "refried" beans in coconut oil, adding some seasonings. Big improvement.

Note about coconut oil: We eat it in our home for it's health benefits. Some health experts recommend consuming 2 T coconut oil per day. No problem, I use it in my cooking all the time.


Easy Re-fried Beans recipe:

2 T. virgin or deodorized coconut oil
1 clove garlic, smashed
1 pinch hot red chili pepper flakes
1 can refried beans of choice
1/4 c. plus 2 T. purified water, divided
1/2 t. onion powder
1 pinch cumin powder


Method:

Saute the garlic and red pepper flakes in coconut oil until very fragrant and sizzling.

Add the can of beans and stir to mix together.

Add 1/4 c. water to thin the beans, mixing in well.

Add the onion powder and a pinch of cumin. mix in well.

Brown the beans, turning occasionally, until they thicken up and have areas that are browned nicely. This gives a great flavor to the re-fried beans.

Add a touch more water (about 2 T.) to thin the beans to a nice consistency.

Taste for seasonings and adjust if needed. If you used unsalted beans, add salt to taste.

Serve hot.


Note: You can use half bacon fat and half coconut oil for even more flavor!


Photos of the cooking process:


Get out all your ingredients first.

Coconut oil, garlic, and red chili pepper flakes go into a frying pan.

Saute the spices until they become very fragrant and sizzling.

Add the boring canned refried beans and stir.

Add 1/4 c. purified water to thin.

Add onion powder and cumin.

Brown, with occasional stirring.

The beans are done browning. Add a couple more T. water to thin again to desired consistency.

Serve the now delicious refried beans with your meal of choice (in this case, fajitas).


Enjoy,

Leila.